I still remember the year I tried to impress my future in-laws with a from-scratch red velvet cake that looked like it had been attacked by a rogue food coloring bottle. The thing was streaky, dry, and had the texture of a kitchen sponge that had seen better days. My mother-in-law took one polite bite, smiled through clenched teeth, and suggested we "maybe try store-bought next year." Fast forward to last December when I served this Christmas Red Velvet Poke Cake at the same family gathering. The room went dead silent for ten full seconds — the kind of hush that either means complete disaster or transcendent deliciousness. Then my father-in-law asked if I had secretly gone to pastry school. My mother-in-law requested the recipe before dessert was even over. And my husband? He wrapped his arm around my waist and whispered, "You just became a holiday legend."
Here's the beautiful irony: this show-stopping dessert starts with a boxed mix. Before you clutch your pearls and call the baking police, let me explain why that's not just acceptable but actually brilliant. The cake mix gives you a foolproof foundation, but the magic happens when you transform it into a poke cake — those little holes you create become tunnels of vanilla pudding that keep every bite impossibly moist. Add a cloud of green-tinted whipped topping and a snowfall of Christmas sprinkles, and suddenly you've got a dessert that looks like it took culinary school training and three days of effort. The reality? You can knock this out between present-wrapping sessions while binge-watching holiday movies.
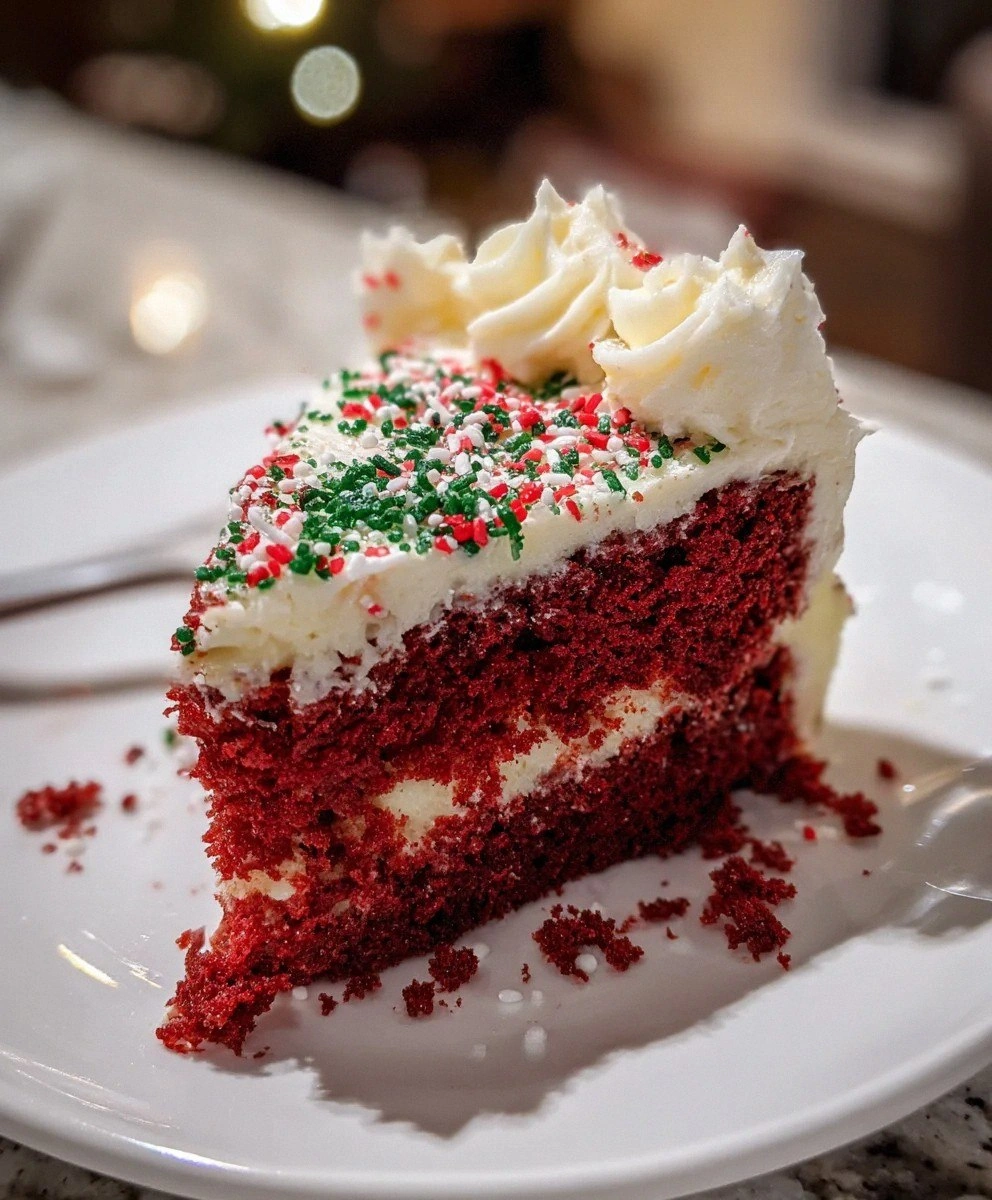
What makes this version different from every other red velvet recipe cluttering the internet is the deliberate balance of convenience and luxury. We're not just dumping a can of frosting on a cake and calling it a day. We're creating layers of texture and temperature that make each forkful feel like unwrapping a present. The cake stays chilled, the pudding stays creamy, and the whole thing develops this almost cheesecake-like richness without any of the water-bath drama. Picture yourself pulling this out of the fridge on Christmas Eve, the green and red colors glowing like stained glass, your kitchen smelling like vanilla and childhood memories. That first slice releases a sigh of cold air that smells like winter happiness.
Let me walk you through every single step — by the end, you'll wonder how you ever made it any other way.
What Makes This Version Stand Out
Moisture Miracle: Traditional red velvet cakes can be finicky divas that dry out faster than your Christmas tree if you look at them wrong. The poke-and-pudding technique ensures every crumb stays hydrated like it's at a spa retreat, giving you that professional bakery texture that stays perfect for days.
Color-Perfect Guarantee: Most home bakers panic about getting that iconic red hue right. Starting with a quality mix eliminates the guesswork and food-coloring roulette that leaves you with either bubblegum pink or crime-scene crimson. The color stays rich and even throughout.
Stress-Free Entertaining: While your guests are nursing their eggnog and debating whether Die Hard is a Christmas movie, you're not stuck in the kitchen fussing with candy thermometers. This cake can be made entirely the night before and just gets better as it chills.
Texture Playground: Each bite delivers a symphony — the tender cake, the silky pudding pockets, the airy whipped topping, and the festive crunch of sprinkles. It's like someone took all the best parts of holiday desserts and layered them into one magnificent creation.
Visual Showstopper: The contrast between the deep red cake, emerald green topping, and snowy sprinkles creates a dessert that photographs like a magazine spread. Your Instagram will break the internet faster than you can say "presents."
Kid-Friendly Assembly: Little hands can help poke holes, spread pudding, and shower sprinkles. It's like edible craft time that ends with dessert, making it the perfect family baking project when everyone's on vacation.
Budget Luxury: Using everyday ingredients strategically makes this taste like a million bucks without the million-dollar price tag. You could buy ingredients for ten of these for the cost of one fancy bakery version.
Alright, let's break down exactly what goes into this masterpiece...
Inside the Ingredient List
The Flavor Base
The red velvet cake mix isn't just a shortcut — it's your insurance policy against holiday baking disasters. Look for a premium mix that lists buttermilk powder in the ingredients; this gives you that subtle tang that separates real red velvet from just red-colored chocolate cake. The eggs you add aren't just binding agents — they're your moisture managers, creating that tender crumb that makes people close their eyes when they take a bite. Vegetable oil might seem basic, but it's what keeps the cake luxuriously moist even after days in the fridge, unlike butter that can turn your cake into a crumbly mess when cold.
The Texture Crew
Instant vanilla pudding mix is your secret weapon for creating those signature pockets of creamy magic. Don't get tempted by cook-and-serve varieties — they set too firm and you'll lose that spoonable softness. Whole milk transforms the pudding from ho-hum to heavenly; the extra fat creates a richer, more luxurious texture that complements the cake rather than just filling space. When you whisk these together, you're not just making pudding — you're creating edible silk that will seep into every nook of your cake.
The Unexpected Star
Whipped topping gets a bad rap from baking snobs, but here's the truth — it holds its structure better than hand-whipped cream in the fridge, meaning your cake stays picture-perfect for the entire holiday week. The slight sweetness balances the tang of the red velvet without competing for attention. When you fold in that green food coloring, start with just two drops. You can always add more, but you can't un-clown your cake when it starts looking like radioactive slime.
The Final Flourish
Christmas sprinkles aren't just decorative — they add tiny bursts of sugar crunch that make each bite interesting. Mix red and white for classic candy-cane vibes, or go wild with multicolor for a more playful look. Pro tip: toss them with a teaspoon of flour before sprinkling — this prevents the colors from bleeding into your whipped topping and keeps everything looking crisp and professional.
Everything's prepped? Good. Let's get into the real action...
The Method — Step by Step
- Preheat your oven to 350°F, but here's the thing — don't trust that dial. Most home ovens run 25 degrees hot or cold, so if you haven't calibrated yours recently, grab an oven thermometer. While it's heating, grease your 9x13 pan with butter, then dust with cocoa powder instead of flour. This little trick gives you bakery-style edges that release perfectly and adds an extra whisper of chocolate flavor that complements the red velvet beautifully. The cocoa won't show up as white streaks on your dark cake like flour would.
- Mix your cake according to package directions, but replace the water with buttermilk for next-level tenderness. The acid in buttermilk breaks down gluten strands, giving you that melt-in-your-mouth texture that makes people ask for your secret. Beat for exactly two minutes — no more, no less. Over-mixing develops gluten and gives you a tough cake, while under-mixing leaves you with flour pockets that taste like paste. The batter should look like liquid velvet, smooth and glossy with no lumps.
- Pour into your prepared pan and give it a gentle shimmy shake to level the batter. This prevents doming and ensures even baking. Slide it onto the middle rack and set your timer for 28 minutes, but start checking at 25. You're looking for edges that pull slightly away from the pan and a center that springs back when you press gently. A few moist crumbs on a toothpick are perfect — remember, this cake will get more moisture from the pudding later. Over-baking now is the fastest way to ruin the whole project.
- Cool for exactly 15 minutes — this is the Goldilocks zone where the cake is set enough to poke but still warm enough to absorb pudding. Use the handle of a wooden spoon to poke holes in a grid pattern, spacing them about an inch apart. Go all the way to the bottom but don't go crazy — you want tunnels, not craters. The cake should look like it's been visited by a very neat woodpecker. If any crumbs stick to your spoon, wipe it between pokes to keep the holes clean.
- Whisk your pudding mix with milk for exactly two minutes until it thickens to the consistency of yogurt. It should ribbon off the spoon in smooth sheets. Immediately pour it over the warm cake, using a spatula to guide it into the holes. Don't spread it like frosting — let gravity do the work. Tap the pan gently on the counter to release air bubbles and help the pudding settle. You'll see it disappearing into the holes like magic, leaving a thin, glossy layer on top.
- Refrigerate uncovered for 30 minutes to set the pudding. This prevents the topping from sliding off later. While it chills, tint your whipped topping in a separate bowl. Add green coloring one drop at a time, folding gently after each addition. You're going for Christmas-tree green, not Incredible-Hulk neon. The color will deepen slightly as it sits, so stop when you're one shade lighter than your target.
- Spread the green topping over the chilled cake like you're frosting a cloud. Start in the middle and work outward, using gentle strokes to avoid picking up cake crumbs. Create little swirls and peaks for texture — this isn't supposed to look perfect. Think of it as frosting with personality. Leave a quarter-inch border around the edges for a professional bakery look that prevents smearing on your container lid.
- Time for the grand finale — your sprinkles. Hold them about 8 inches above the cake and let them rain down in a gentle shower. This prevents clumping and gives you even coverage. Don't dump them from close range unless you want patchy clusters. Aim for a light dusting that looks like fresh snow on pine branches. You can always add more, but you can't take them off without messing up your topping.
- Cover with plastic wrap, pressing it directly onto the surface to prevent a skin from forming. Chill for at least 4 hours, but overnight is better. The flavors meld, the pudding fully hydrates the cake, and everything sets to the perfect texture. When you're ready to serve, use a sharp knife dipped in hot water for clean cuts. Wipe between slices for bakery-perfect presentation that'll make everyone think you went to culinary school.
That's it — you did it. But hold on, I've got a few more tricks that'll take this to another level...
Insider Tricks for Flawless Results
The Temperature Rule Nobody Follows
Cold pudding on warm cake is the secret handshake of professional poke cakes. If your pudding is room temperature, it won't seep properly and you'll get sad, dry patches. Pop your milk in the freezer for 10 minutes before mixing, and your pudding will be perfectly chilled and ready to flow. Conversely, if your cake is too hot, the pudding will become watery and pool on top instead of soaking in. That 15-minute cooling window isn't negotiable — set a timer and walk away if you have to.
Why Your Nose Knows Best
Your sense of smell is the most underutilized baking tool. When the cake is perfectly done, your kitchen will smell like vanilla and warm chocolate with a hint of butter. If you smell sharp or burnt notes, you've gone too far. Trust your nose over the timer — ovens vary, but your olfactory senses are calibrated to your kitchen. This is especially crucial for red velvet, which can go from perfect to dry in under two minutes.
The 5-Minute Rest That Changes Everything
After adding the pudding, let the cake sit at room temperature for exactly 5 minutes before refrigerating. This allows the pudding to start setting in the holes rather than just running through to the bottom. You'll get distinct pudding pockets instead of a soggy base. It's the difference between a poke cake and a pudding soup with cake chunks floating in it.
The Sprinkle Timing Secret
Add sprinkles right before serving if you want them to stay crisp and colorful. They'll start to bleed color and get slightly chewy after about 12 hours in the fridge. For make-ahead cakes, store them separately in an airtight container and let guests add their own. It's like a interactive dessert bar that keeps everyone engaged and your cake looking fresh.
Creative Twists and Variations
This recipe is a playground. Here are some of my favorite ways to switch things up:
The Mint-Chocolate Mountain
Replace vanilla pudding with white chocolate pudding mix and add a quarter teaspoon of peppermint extract to the whipped topping. Crush candy canes and sprinkle between the layers for a winter wonderland effect that tastes like Christmas morning. The mint cuts through the richness and leaves your palate feeling refreshed rather than overwhelmed.
The Gingerbread Man's Dream
Add a teaspoon of gingerbread spice to your cake mix and swap the vanilla pudding for butterscotch. Top with gingersnap crumbs instead of sprinkles. The warm spices create a hug-in-a-bowl effect that makes your whole house smell like you're living inside a holiday candle. This version converts even the most devoted chocolate fans.
The White Christmas Edition
Use white cake mix with red food coloring for the cake, creating a reverse red velvet effect. Tint the pudding green instead of the topping, then cover with white chocolate shavings. It's stunningly elegant and perfect for grown-up holiday parties where you want sophistication without sacrificing fun.
The Hot Cocoa Remix
Add a packet of hot cocoa mix to your pudding for extra chocolate depth. Top with mini marshmallows and a drizzle of chocolate syrup right before serving. Use a kitchen torch to toast the marshmallows for s'mores vibes that'll have adults fighting kids for the corner pieces.
The Eggnog Extravaganza
Replace half the milk in the pudding with eggnog and add a splash of rum extract to the whipped topping. Dust with fresh nutmeg and you'll transport everyone to a cozy fireplace scene, even if you're celebrating in Florida. The eggnog flavor intensifies as it sits, making leftovers even better.
The Tropical Holiday
For those celebrating in warmer climates, add coconut extract to the cake and use coconut milk in the pudding. Top with toasted coconut flakes and red maraschino cherries. It's Christmas vacation on a plate — festive colors with beach vacation vibes that somehow works beautifully.
Storing and Bringing It Back to Life
Fridge Storage
Store covered in the refrigerator for up to 5 days, though I dare you to make it last that long. Press plastic wrap directly onto the surface to prevent the whipped topping from forming a skin. If it does develop a slight film, just whisk the top layer gently before serving — good as new. The flavors actually improve after day two as the pudding fully permeates every crumb.
Freezer Friendly
You can freeze individual slices wrapped tightly in plastic wrap then foil for up to 2 months. Thaw overnight in the refrigerator and add fresh whipped topping and sprinkles after thawing. The texture changes slightly — it becomes more like an ice cream cake, which honestly isn't a bad thing. Don't freeze the whole cake unless you want to serve it frozen as a holiday ice cream cake alternative.
Best Reheating Method
This cake is meant to be served cold, but if your fridge runs extra-cold and the cake seems too firm, let it sit at room temperature for 15 minutes before serving. Never microwave — you'll turn the pudding to soup and the topping to foam. If you must warm it slightly, place the whole pan (uncovered) in a 200°F oven for exactly 5 minutes. Any longer and you're in meltdown territory.