Introduction
I still remember the night I ruined a $40 rib-eye. It was supposed to be the star of my brother’s birthday dinner, but instead it hit the pan, seized up like a frightened armadillo, and emerged gray, tough, and tasting of disappointment. While everyone else politely chewed (and chewed… and chewed), I mentally replayed every culinary crime I’d committed: too-high heat, zero patience, and the arrogance of thinking “it’s just steak, how hard can it be?” That culinary face-plant sent me down a months-long rabbit hole of briskets, chuck roasts, and every slow-cooking trick known to mankind until—finally—this recipe was born. Friends, I am here to save you from the same rubbery fate with a cut that costs half as much, cooks itself while you binge your favorite show, and emerges so fork-tender you could slice it with the side of a spoon.
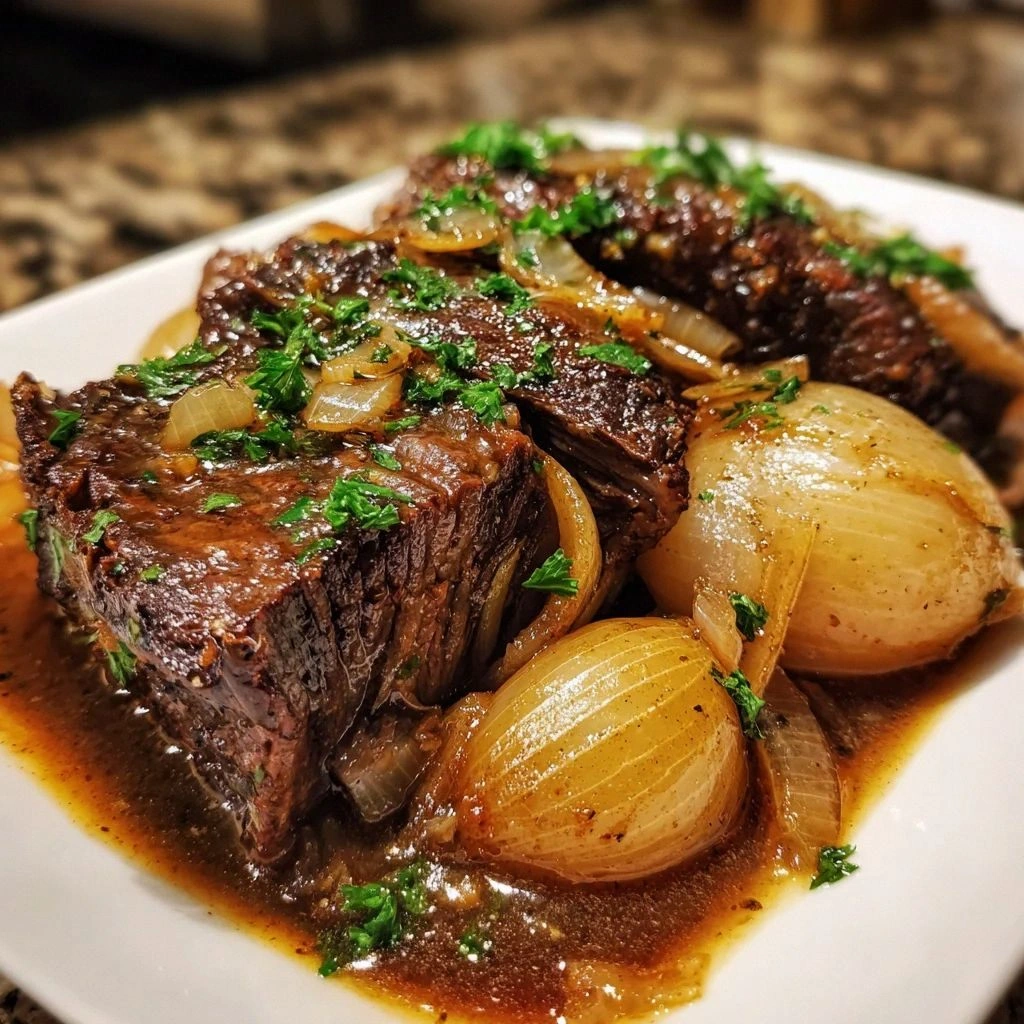
Picture yourself on a rainy Sunday: the windows fogged, the Dutch oven burbling like a jacuzzi for cows, and the whole kitchen wrapped in a perfume of garlic, onion, and beefy nostalgia that sneaks into every corner of the house. You lift the lid after three lazy hours and the meat practically sighs apart, revealing fibers so juicy they glisten like polished mahogany. One taste and you’ll understand why my neighbor rang the doorbell at 9 p.m. “I smelled something illegal,” he joked, then proceeded to eat two bowls straight from the pot while standing at my counter. I dare you to taste this and not go back for seconds; I double-dog dare you to leave any for tomorrow’s lunch.
Most recipes get this completely wrong. They tell you to sear the heck out of the roast first, then wonder why the center stays shoe-leather tough. Others drown the meat in watery broth, ending up with gray, flabby sadness. Here’s what actually works: a gentle, low-and-slow braise that converts stubborn collagen into silky gelatin, a kiss of tomato paste for tangy depth, and Worcestershire for the umami bomb that makes your tongue do backflips. Stay with me here—this is worth it.
Let me walk you through every single step—by the end, you’ll wonder how you ever made it any other way.
What Makes This Version Stand Out
- Unreal Tenderness: We’re talking spoon-sliding-through-butter texture achieved with nothing fancier than a heavy pot, time, and a temperature so low it’s practically a lullaby.
- Zero Babysitting: Once the lid goes on, this roast becomes the introvert of the culinary world—happy to sit quietly and sort itself out for hours while you sort your life out.
- Flavor Layering: Onion jam sweetness, garlic swagger, tomato brightness, and Worcestershire depth all stack like a choir hitting a five-part harmony in your mouth.
- Budget Hero: Chuck roast costs a fraction of prime steaks yet tastes like you mortgaged the house for Wagyu once it’s done bathing in its own glorious gravy.
- Make-Ahead Magic: Flavors meld overnight into something even more swoon-worthy; reheat gently and guests assume you’ve been slaving all day.
- Crowd Pandemonium: I’ll be honest—I ate half the batch before anyone else got to try it. My excuse? “Quality control.”
Alright, let’s break down exactly what goes into this masterpiece...
Inside the Ingredient List
The Flavor Base
Chuck roast is the undisputed heavyweight champion of cheap cuts. It’s marbled like a Renaissance sculpture, threaded with fat that melts into unctuous silk under low heat. Skip the lean stuff—sirloin will leave you chewing like a cow working cud, and tenderloin is too polite to give you that soulful beefiness. When you’re at the butcher counter, look for a roast with striations of white fat running through it like lazy lightning bolts; that intramuscular fat is your built-in basting system.
The Texture Crew
Beef broth is the swimming pool our meat luxuriates in. Use low-sodium so you control the salt narrative—nobody wants a briny mouthful that obliterates every other flavor. If you’ve only got regular broth, cut it with equal parts water and simmer uncovered for the last 30 minutes to concentrate taste without assaulting your arteries. Homemade broth is, of course, the Rolls-Royce option; if you’ve got some stashed in the freezer, you’ve earned a smug sip of wine.
The Unexpected Star
Tomato paste is the culinary equivalent of turning the bass dial up on a great song. Just two tablespoons create tangy-sweet undertones and help thicken the gravy into glossy lava. Don’t even think about subbing ketchup; its sugary cloy will hijack the savory symphony. Instead, buy the concentrated paste in a tube so you can use a dab here, a dab there, without excavating a whole can.
The Final Flourish
Fresh parsley is optional, sure, but so are compliments—and we all like those. A quick chiffonade sprinkled at the end gives a pop of chlorophyll that fools your brain into thinking something light and springy just happened, even though you’ve been eating forkfuls of velvet beef. No parsley? Thin-sliced chives or even celery leaves work; green is the color of “I meant to do something healthy,” and we’ll happily accept the illusion.
Everything’s prepped? Good. Let's get into the real action...
The Method — Step by Step
- Pat and Season Like You Mean It: Unwrap your chuck roast, grab a wad of paper towels, and blot every surface until it’s drier than a stand-up comedian’s wit. Moisture is the enemy of a gorgeous sear; water will steam, not brown. Shower the meat generously with salt and freshly cracked black pepper. Don’t be timid—beef this size can handle what looks like “too much.” Think of it as a winter coat; the meat will shrug off the excess and carry just enough into the pot.
- Sear Until the Neighbors Get Jealous: Heat olive oil in a heavy Dutch oven until it shimmers like a desert horizon. Lay the roast in gently; that immediate sizzle should sound like applause. Let it sit, untouched, for three full minutes. I know you want to poke, but restraint equals crust. When the edges turn the color of antique mahogany, flip and repeat. Remove the roast to a plate; those browned bits stuck to the bottom are fond, a.k.a. flavor crystals—guard them with your life.
- Onion Jam Magic: Lower heat to medium, tumble in sliced onions, and stir to coat them with the shimmering fat and speckles of fond. They’ll start opaque, then sweat, then caramelize into sweet, jammy strands that smell like grandma’s kitchen on Thanksgiving. This takes about eight minutes. If they threaten to burn, splash a tablespoon of broth to deglaze; the steam lifts the brown bits and saves you from a smoky disaster.
- Garlic Flash Mob: Clear a small circle in the center of the pot, add minced garlic, and let it perfume for 30 seconds—no longer or it’ll turn acrid. Fold everything together; the aroma should smack you with visions of crusty bread and butter. Okay, ready for the game-changer?
- Tomato Paste Caramelization: Scoot onions and garlic to the rim, add tomato paste to the exposed pan floor, and stir it gently. The paste will darken from bright Ferrari red to a brick hue and smell faintly sweet. This two-minute detour cooks out raw acidity and unlocks natural sugars, giving your sauce a bass-note richness you can’t achieve by merely simmering.
- Liquid Assets: Return the roast plus any resting juices, pour in beef broth until it comes halfway up the meat’s sides, and add Worcestershire. The liquid should look murky and promising, like a pirate’s treasure map. Bring it to a lazy bubble—no rolling boil, lest you toughen proteins—then slap on the lid.
- Low-and-Slow Naptime: Slide the pot into a 325 F (160 C) oven. The goal is a gentle burble, not a jacuzzi. Let it go for 2.5 to 3 hours. This next part? Pure magic. Collagen breaks down into gelatin around 160-180 F internal, so maintaining a mellow heat is crucial. Picture yourself pulling this out of the oven, the whole kitchen smelling incredible, juices shimmering like liquid rubies.
- Fork-Tender Check: At the 2.5-hour mark, wiggle the bone (if there is one) or prod with tongs. The meat should offer zero resistance and threaten to fall apart like a badly constructed sandcastle. If it still feels tight, give it another 20-30 minutes. Trust your senses, not the clock; every roast has an attitude.
- Rest and Reduce: Transfer the roast to a board, tent loosely with foil, and let it nap while you boil the sauce on the stovetop for 5-7 minutes until it coats a spoon like velvet. This concentration step is where restaurant-quality gloss happens. Skim excess fat if you like, but leave a little—it carries flavor and mouthfeel.
- Shred or Slice—Your Call: Either pull the meat into rustic chunks with two forks or slice against the grain if you want tidy slabs bathing in sauce. Return meat to the pot, drown it with that mahogany gravy, and shower with parsley if using. Serve hot over mashed potatoes, polenta, or shamelessly eat it solo standing at the stove.
That's it—you did it. But hold on, I've got a few more tricks that'll take this to another level...
Insider Tricks for Flawless Results
The Temperature Rule Nobody Follows
Your oven lies. The dial may claim 325 F, but the actual cavity can swing 15-20 degrees either way. Spend $10 on an oven thermometer, hang it from the rack, and adjust accordingly. Consistency is the difference between “meh” and “I need a moment alone with this pot.”
Why Your Nose Knows Best
Halfway through cooking, you should smell a mellow, meaty aroma drifting through the house. If you detect sharp, acrid notes, your heat is too high; if you smell nothing, it’s too low. Trust that olfactory alarm bell and tweak. A friend tried skipping this step once—let’s just say it didn’t end well, and the smoke alarm became the dinner bell.
The 5-Minute Rest That Changes Everything
Even after the oven, the meat fibers tense up like overworked shoulders. Letting the roast sit in its own steamy environment before shredding allows juices to redistribute. Skip this and you’ll watch precious gravy puddle uselessly on the cutting board instead of staying inside the strands where it belongs.
Creative Twists and Variations
This recipe is a playground. Here are some of my favorite ways to switch things up:
Smoky Cowboy Style
Swap half the broth for dark beer, add a chipotle in adobo, and finish with a whisper of smoked paprika. The resulting gravy tastes like a campfire sing-along—perfect for spooning over cornbread.
Moroccan Sunset
Stir in a cinnamon stick, a handful of dried apricots, and a pinch of cumin. The sweet-savory perfume transports you straight to a Marrakech souk. Serve over couscous and garnish with toasted almonds.
Mushroom Forest Blend
Add a pound of cremini and shiitake during the last hour of braising. They soak up beefy juices and provide meaty chew for anyone who loves surf-and-turf vibes without the surf.
Asian-Inspired Twist
Replace Worcestershire with soy sauce, add a star anise pod and a few slices of ginger. Finish with scallions and sesame oil for a noodle-bowl-ready protein that’ll ruin takeout for you forever.
Red Wine Elegance
Substitute one cup of broth with a bold red wine like Shiraz. The tannins marry with beef fat to create a glossy, restaurant-grade sauce. Perfect for date night when you want to look effortlessly classy.
Green Chile Comfort
Roast two poblano peppers, peel, seed, and slip them into the pot with a handful of cilantro stems. The gentle heat and grassy notes turn everyday roast into a Southwestern hug.
Storing and Bringing It Back to Life
Fridge Storage
Cool the meat completely in its sauce, transfer to airtight containers, and refrigerate up to four days. Keep meat submerged to prevent drying; the sauce forms a protective flavor force-field. If a fat cap solidifies on top, leave it—this natural seal keeps oxygen out. Skim just before reheating.
Freezer Friendly
Portion into freezer bags, press out excess air, and lay flat to freeze up to three months. Thin packets thaw faster and save precious cubic inches. Label with the date; future you is busy and forgetful. Pro tip: freeze some sauce ice cubes to toss into weeknight soups for instant depth.
Best Reheating Method
Low and slow wins again. Place meat and sauce in a covered skillet over medium-low heat with a splash of broth. Add a tiny splash of water before reheating—it steams back to perfection. Microwave works in a pinch, but expect slightly stringy edges; always use 50 percent power and stir every minute until just warmed through.