Picture this: It's 11:47 p.m. on a Tuesday, you're standing in your kitchen wearing mismatched socks, staring at a sad package of store-bought gluten-free cookies that taste like sweetened cardboard. Your Italian grandmother's ghost is probably rolling her eyes from the great beyond because you've been craving tiramisu for three weeks straight, but every gluten-free version you've tried tastes like someone replaced the ladyfingers with compressed sawdust. I know this scene intimately because I lived it, right down to the sock situation, until one fateful night when desperation met determination and I decided to crack the code on the silkiest, most luxurious gluten-free tiramisu that would make nonna weep with joy instead of disappointment.
What followed was six months of obsessive testing, twelve pounds of mascarpone, three near-miss kitchen fires, and one incident involving my neighbor's espresso machine at 2 a.m. that we don't discuss anymore. But here's the thing — I finally did it. I created a gluten-free tiramisu that doesn't just mimic the original, it actually surpasses it in ways that made my toughest Italian food critic friend (you know the type, the one who swears nothing beats the version from that tiny café in Rome) admit defeat and ask for the recipe. The secret isn't just swapping out regular ladyfingers for gluten-free ones and calling it a day; it's about completely reimagining how we build those coffee-soaked layers of heaven.
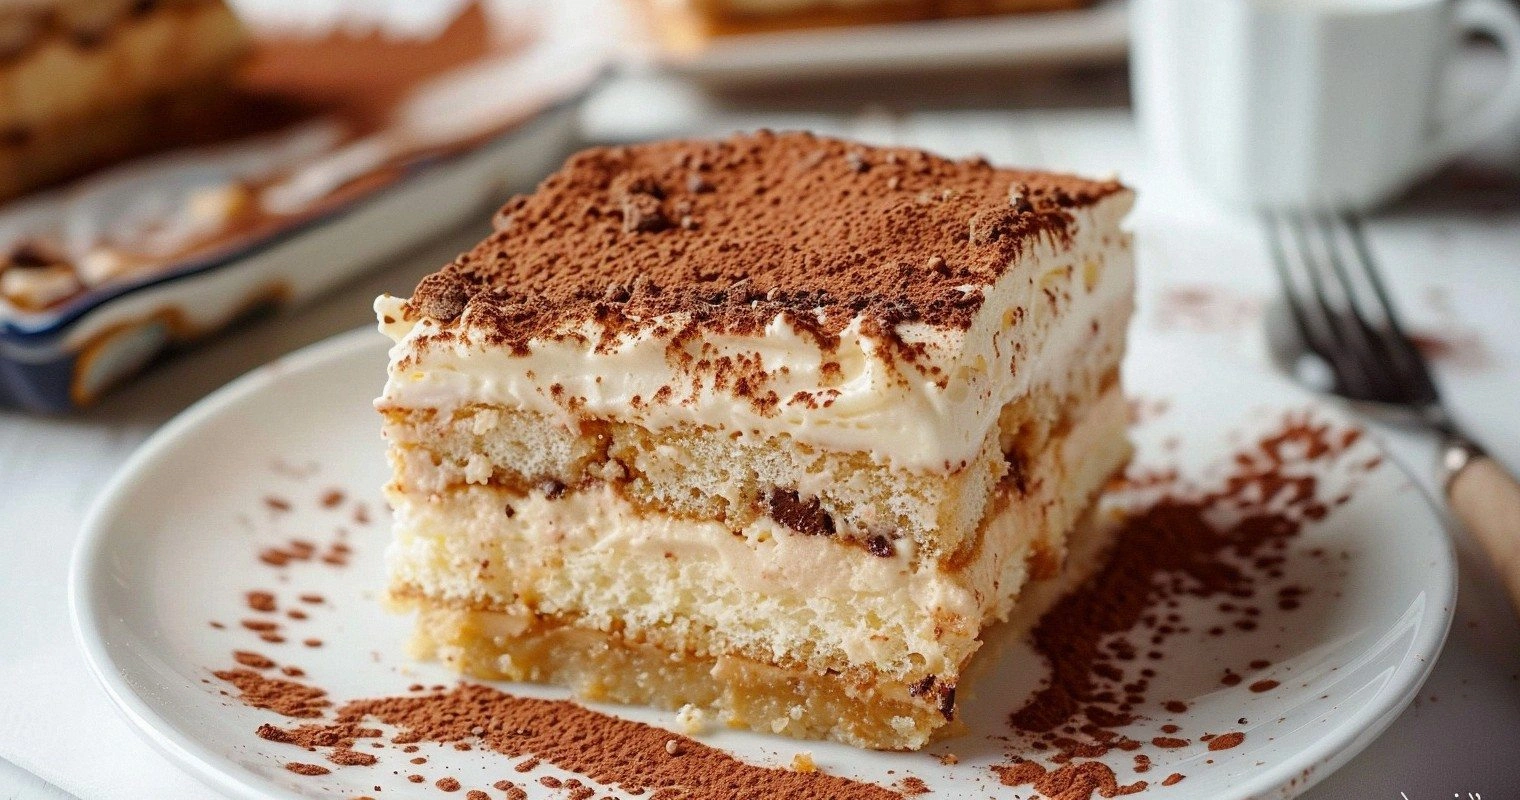
Now, before you panic about complicated techniques or impossible-to-find ingredients, take a deep breath. This recipe uses ingredients you can find at any decent grocery store, and the method is actually simpler than traditional tiramisu because we're eliminating the risky raw-egg situation entirely. Instead, we're creating a custard base that's foolproof, ladyfingers that stay tender even after their espresso bath, and a mascarpone cream so light it practically floats off the spoon. The result is those perfect clean layers that slice like a dream, the coffee and cocoa creating that beautiful marbled effect that looks like it came from a pastry shop in Milan.
Let me walk you through every single step — by the end, you'll wonder how you ever made it any other way.
What Makes This Version Stand Out
- Cloud-Like Texture: The mascarpone cream incorporates just enough air to create those signature layers that melt on your tongue like coffee-flavored snow, but firm enough to hold perfect slices. Traditional recipes often turn dense or weepy after a day, but this version stays ethereal for up to five days in the fridge.
- No-Risk Custard Base: Most tiramisu recipes rely on raw eggs, which tastes incredible but makes everyone nervous about food safety. My version uses a gentle cooking method that creates the same rich, custardy flavor without any risk, making it safe for kids, pregnant women, and anyone who's ever had a run-in with questionable raw eggs.
- Triple Coffee Impact: Instead of just soaking the ladyfingers in espresso, we're layering coffee flavor three ways — strong espresso for soaking, espresso powder in the cream, and a coffee-rum syrup brushed between layers. Each bite delivers that perfect coffee kick without overwhelming the delicate mascarpone.
- Make-Ahead Magic: This tiramisu actually improves after 24-48 hours in the fridge, making it the ultimate dinner party dessert. The flavors meld and deepen, the texture sets perfectly, and you can serve it straight from the fridge while your guests think you're a dessert wizard.
- Gluten-Free That Doesn't Taste Like Compromise: The homemade ladyfingers use a blend of rice flour and almond flour that creates a texture indistinguishable from traditional ones. They stay tender after soaking instead of turning to mush, which is the downfall of most gluten-free versions.
- Flexible Sweetness: The recipe includes options to adjust sweetness levels, from barely-sweet for dark chocolate lovers to crowd-pleasing levels for those who prefer traditional sweetness. You're in complete control of the final flavor profile.
- Presentation Perfection: With my layering technique, you'll achieve those Instagram-worthy clean layers that look like they came from a professional pastry kitchen. Even if you're all thumbs in the kitchen, this recipe makes you look like a dessert artist.
- Impressive Yet Approachable: Despite looking like a restaurant-quality dessert, this recipe uses techniques that any home cook can master. No special equipment needed beyond a hand mixer and some patience.
Alright, let's break down exactly what goes into this masterpiece...
Inside the Ingredient List
The Flavor Foundation
Mascarpone cheese is the star here, and quality matters tremendously. Skip the supermarket brand that's been sitting in the dairy case for weeks — you want the fresh stuff, preferably imported from Italy if you can find it. The difference is staggering: fresh mascarpone has a subtle sweetness and tang that makes the cream sing, while older versions taste flat and can even develop a grainy texture that ruins the silkiness we're after. When you're shopping, look for containers with the furthest expiration date, and if you see any liquid separation, put it back immediately. This isn't the place to save a few dollars; spring for the good stuff and your taste buds will thank you for weeks.
Espresso is equally crucial, and here's where most recipes go wrong by using weak coffee or instant espresso powder alone. You need real, strong espresso — the kind that makes your heart race just smelling it. If you don't have an espresso machine, those stovetop moka pots work beautifully, or use the strongest coffee your local café will make for you. The coffee needs to be bold enough to stand up to the creamy mascarpone without getting lost, but not so bitter that it overpowers the delicate balance we're creating. I use a medium-dark roast, brewed extra strong, then cooled completely before soaking the ladyfingers.
The Texture Crew
The egg yolks create the rich, custardy base that makes this tiramisu taste like it came from a Roman café. Free-range eggs with deep orange yolks will give you the most luxurious color and flavor, plus they whip up lighter and create more volume. Don't even think about using those pale, sad supermarket eggs that look like they came from a ghost chicken — your tiramisu will taste as anemic as it looks. The yolks get gently cooked with sugar until they turn thick and pale, creating a base that's safe to eat but still has that authentic tiramisu flavor profile.
Heavy cream gets whipped and folded into the mascarpone base, and this is where the magic happens. Use cream with at least 36% fat content — anything less won't whip properly and can turn grainy when combined with the mascarpone. The cream should be ice-cold, and your bowl and beaters should spend ten minutes in the freezer before you start. This isn't being fussy; it's the difference between soft peaks that hold their shape and cream that deflates into a sad puddle when you try to fold it.
The Unexpected Star
Rice flour and almond flour team up to create ladyfingers that are so good, you'll want to eat them straight from the oven. The rice flour provides structure and that familiar cookie texture, while the almond flour adds richness and keeps them tender even after their espresso bath. Don't substitute all-purpose gluten-free flour here — it contains gums and starches that will make your ladyfingers gummy and dense. The combination of these two flours creates cookies that stay light and airy, with just enough structure to hold up when soaked with coffee.
The Final Flourish
Cocoa powder for dusting should be unsweetened and Dutch-processed if possible — it has a deeper, more complex flavor than natural cocoa powder. The difference is like comparing a Hershey's kiss to a piece of Valrhona chocolate; both are chocolate, but one has layers of flavor that make you close your eyes in appreciation. I keep my cocoa powder in an airtight container in the freezer, which preserves the volatile oils that give cocoa its complex flavor. When you're ready to serve, dust it through a fine-mesh sieve for that professional, even coating that makes the dessert look like it came from a Michelin-starred restaurant.
Everything's prepped? Good. Let's get into the real action...
The Method — Step by Step
- Start by making the ladyfingers, which need time to cool and firm up before assembly. Preheat your oven to 350°F and line two baking sheets with parchment paper. In a clean bowl, whip 3 egg whites with a pinch of salt until they form stiff peaks that don't budge when you lift the beaters — this is crucial for light, airy cookies. In a separate bowl, beat the egg yolks with sugar until they turn pale yellow and thick enough to form ribbons when you lift the beaters. Gently fold the whites into the yolk mixture, then sift the rice flour and almond flour over the top and fold until just combined — overmixing here is the enemy of tender ladyfingers.
- Pipe the batter into 3-inch long fingers on your prepared sheets, leaving space between each one because they'll spread during baking. Dust with powdered sugar just before sliding them into the oven — this creates that characteristic crackly top that shatters when you bite into them. Bake for 12-14 minutes until they're golden around the edges but still pale on top, rotating the sheets halfway through for even browning. Cool them completely on wire racks, and try not to eat too many while they're warm because you'll need them all for the tiramisu. I dare you to taste one and not go back for seconds — they're that good on their own.
- While the ladyfingers cool, brew your espresso and let it come to room temperature. You need about 1½ cups of strong espresso, and here's the key: it must be completely cool before you soak the cookies. Hot coffee will turn your ladyfingers to mush faster than you can say "mamma mia." Mix in 2 tablespoons of sugar while it's still warm so the sugar dissolves completely, then add a splash of rum if you're using it. The coffee should taste too strong to drink straight — it needs to be bold enough to flavor the entire dessert.
- Now for the mascarpone cream that's going to change your dessert game forever. In a heatproof bowl, whisk together egg yolks and sugar until they turn pale and thick, about 3-4 minutes of vigorous whisking. Place the bowl over a pot of simmering water (not touching the water) and cook, whisking constantly, until the mixture reaches 160°F on a candy thermometer — this kills any bacteria while creating a safe, custardy base. Remove from heat and whisk in mascarpone until completely smooth and glossy, then let this mixture cool to room temperature. This step is pure magic — the egg yolks transform into something that tastes like the essence of vanilla ice cream.
- In a separate bowl, whip the heavy cream until it forms soft peaks that curl over when you lift the beaters — be careful not to overwhip or you'll end up with butter. Gently fold the whipped cream into the cooled mascarpone mixture in three additions, using a rubber spatula and making figure-eight motions. The goal is to maintain all that beautiful air you just whipped into the cream, creating a mixture that's light enough to float off your spoon. If you've ever struggled with dense, heavy tiramisu, this technique is your new best friend.
- Time to assemble, which is where the real fun begins. Choose a glass dish that shows off the layers — a trifle bowl or 9x13 pan works beautifully. Quickly dip each ladyfinger in the espresso mixture — literally one second per side — and arrange them in a single layer in the bottom of your dish. They should be saturated but not falling apart, which is the difference between perfect tiramisu and coffee-flavored mush. Don't walk away from the espresso here — oversoaking is the fastest way to ruin your dessert.
- Spread half the mascarpone cream over the ladyfingers, using an offset spatula to create an even layer that reaches all the way to the edges. This prevents the cookies from drying out and creates those perfect layers when you slice into the finished dessert. Take your time here — rushed spreading creates uneven layers that look messy when served. The cream should be thick enough to hold peaks but smooth enough to spread easily.
- Repeat the layers once more, ending with a final layer of mascarpone cream that's as smooth as you can make it. Cover the surface with plastic wrap, pressing it directly against the cream to prevent a skin from forming. Refrigerate for at least 6 hours, but 24 hours is even better — this is when the magic happens as the flavors meld and the texture sets to that perfect spoonable consistency. Picture yourself pulling this out of the oven, the whole kitchen smelling incredible, even though you didn't actually bake anything.
- Just before serving, dust the top with cocoa powder using a fine-mesh sieve, creating an even layer that looks professional and polished. For extra drama, you can create a stencil pattern or add chocolate shavings, but honestly, the classic cocoa dusting is perfect as-is. Serve chilled, using a sharp knife dipped in hot water to create clean slices that show off those beautiful layers. Each bite delivers that perfect balance of coffee, cream, and tender cookie that makes tiramisu one of the world's most beloved desserts.
That's it — you did it. But hold on, I've got a few more tricks that'll take this to another level...
Insider Tricks for Flawless Results
The Temperature Rule Nobody Follows
Here's the thing that separates amateur tiramisu from restaurant-quality: every component needs to be the same temperature when you assemble. Room-temperature mascarpone cream meets room-temperature ladyfingers meets room-temperature espresso. When you mix hot espresso with cold cream, you get condensation that creates watery pools and breaks the emulsion, leading to that sad, separated texture that plagues so many homemade versions. I learned this the hard way after producing what looked like tiramisu soup — technically edible but texturally tragic. Now I plan ahead, making sure everything sits out for 30 minutes before assembly, and the results are consistently flawless.
Why Your Nose Knows Best
Your nose is actually the best tool for determining if your mascarpone cream is properly balanced. Before assembling, take a small taste and pay attention to the finish — you should taste coffee first, then cream, then a whisper of sweetness that disappears quickly. If the sweetness lingers, add a pinch more salt to balance it. If the coffee seems weak, whisk in a tiny bit of espresso powder dissolved in hot water. This might seem obsessive, but it's the difference between good tiramisu and the kind that makes people close their eyes and sigh with pleasure. A friend tried skipping this step once — let's just say it didn't end well, and her dinner guests politely pushed their desserts around their plates instead of inhaling them.
The 5-Minute Rest That Changes Everything
After you dust the top with cocoa powder, let the tiramisu rest for five minutes before serving. This isn't just being fussy — it allows the cocoa to hydrate slightly from the moisture in the cream, creating that characteristic dark color and preventing it from tasting powdery. If you've ever had tiramisu where the cocoa powder felt like it was coating your throat, it's because someone skipped this crucial step. During this rest, the cocoa transforms from raw powder to something that tastes like it was always meant to be there, melding with the cream below to create the perfect finishing touch.
The Make-Ahead Miracle
This tiramisu actually improves with age, making it the ultimate dinner party dessert. Day one is good, day two is incredible, and day three is when it reaches its peak as the flavors meld into something transcendent. The coffee permeates every layer, the cream sets to that perfect spoonable consistency, and the ladyfingers achieve that ideal texture that's neither mushy nor crunchy. I'll be honest — I ate half the batch before anyone else got to try it, but I justified it as "quality control testing" across multiple days. Store it covered in the refrigerator for up to five days, though it's never lasted that long in my house.
Creative Twists and Variations
This recipe is a playground. Here are some of my favorite ways to switch things up:
The Chocolate Lover's Dream
Replace the cocoa powder with a mix of Dutch-processed cocoa and finely grated dark chocolate, and add a layer of chocolate shavings between the mascarpone layers. Use chocolate-flavored espresso for soaking the ladyfingers, and finish with a drizzle of chocolate sauce just before serving. This version is so rich that small portions are actually preferred — a rare feat in the dessert world where bigger is usually better.
The Boozy Adult Version
Add ¼ cup of dark rum or Marsala wine to the espresso soaking liquid, and brush each layer of assembled tiramisu with additional liquor. Use coffee liqueur instead of sugar in the mascarpone cream, and serve in small glasses for an elegant dinner party presentation. This is the version that converts people who claim they "don't like dessert" into enthusiastic converts who ask for the recipe before the meal is over.
The Seasonal Pumpkin Spice
Add ½ cup of pumpkin puree and 1 teaspoon of pumpkin pie spice to the mascarpone cream, and use maple syrup instead of sugar in the espresso soaking liquid. Top with candied pecans and a dusting of cinnamon sugar. Despite sounding like a basic fall cliché, the pumpkin actually enhances the coffee flavor while adding seasonal warmth that makes this perfect for holiday gatherings.
The Tropical Escape
Replace the espresso with strong coconut milk mixed with instant espresso powder, add toasted coconut between the layers, and finish with a rum-coconut cream topping. Serve in individual glasses with a tropical fruit garnish for a summer dinner party. The coconut adds richness while keeping the dessert light and refreshing, perfect for hot weather when traditional tiramisu feels too heavy.
The Berry Beautiful
Add a layer of fresh raspberries or strawberries between the mascarpone layers, and replace the cocoa powder with freeze-dried berry powder. The berries add brightness that cuts through the richness while creating beautiful color contrast. This version is especially popular with kids who love the fruity twist on the classic.
The Savory-Sweet Surprise
Add a pinch of sea salt and some fresh rosemary to the mascarpone cream, and use olive oil cake instead of ladyfingers. Finish with a dusting of smoked cocoa powder for a sophisticated flavor profile that challenges everything you thought you knew about tiramisu. This is the version that makes food bloggers weep with joy and your dinner guests talk about your dessert skills for months.
The Breakfast-Approved Version
Use decaf espresso and add a layer of granola between the mascarpone layers, creating a tiramisu that's socially acceptable to eat for breakfast. Replace the rum with vanilla extract, and serve in small mason jars for a brunch party. Your guests will think you're brilliant for serving "breakfast" that tastes like dessert, and you'll know the secret that it's actually just tiramisu in disguise.
Storing and Bringing It Back to Life
Fridge Storage
Store your tiramisu covered in the refrigerator for up to five days, though it's at its peak on days two through four. Use plastic wrap pressed directly against the surface to prevent it from absorbing other flavors from your fridge — nobody wants onion-scented tiramisu. If you've already cut into it, press the wrap against the cut surfaces as well to prevent them from drying out. The key is keeping air away from the cream, which can cause it to develop a skin or absorb odors from stronger-smelling foods in your refrigerator.
Freezer Friendly
While tiramisu isn't ideal for freezing due to the dairy content, you can freeze individual portions for up to one month if you're desperate. Wrap each piece tightly in plastic wrap, then aluminum foil, and thaw overnight in the refrigerator. The texture will be slightly denser than fresh, but the flavor remains excellent. This is perfect for those moments when you need a sophisticated dessert but don't have time to make anything from scratch. I've been known to keep a stash of frozen portions for emergency dinner party situations, and no one has ever complained about the texture difference.
Best Reheating Method
Here's the beautiful thing — tiramisu doesn't need reheating! In fact, reheating would destroy the delicate texture you've worked so hard to achieve. Simply remove it from the refrigerator 15-20 minutes before serving to take the chill off slightly, which allows the flavors to bloom and the texture to soften just enough to be perfectly spoonable. If you've added any chocolate garnishes that have become too firm in the fridge, you can warm them briefly with a kitchen torch, but the tiramisu itself should stay cold. This make-ahead nature is what makes tiramisu the perfect dinner party dessert — you can serve it straight from the fridge while your guests think you're the most organized host ever.