I still remember the day I nearly set my kitchen on fire trying to make a strawberry pretzel salad for my neighbor's baby shower. The gelatin layer looked like something from a horror movie, the pretzels were soggy, and I was ready to swear off baking forever. But as I sat there eating the failed components straight from the pan—crunchy pretzels, sweet strawberries, and those pillowy marshmallows I'd bought for backup—a lightning bolt hit me. What if I combined all these flavors into something that actually worked? Something that didn't require gelatin wrestling or praying to the dessert gods?
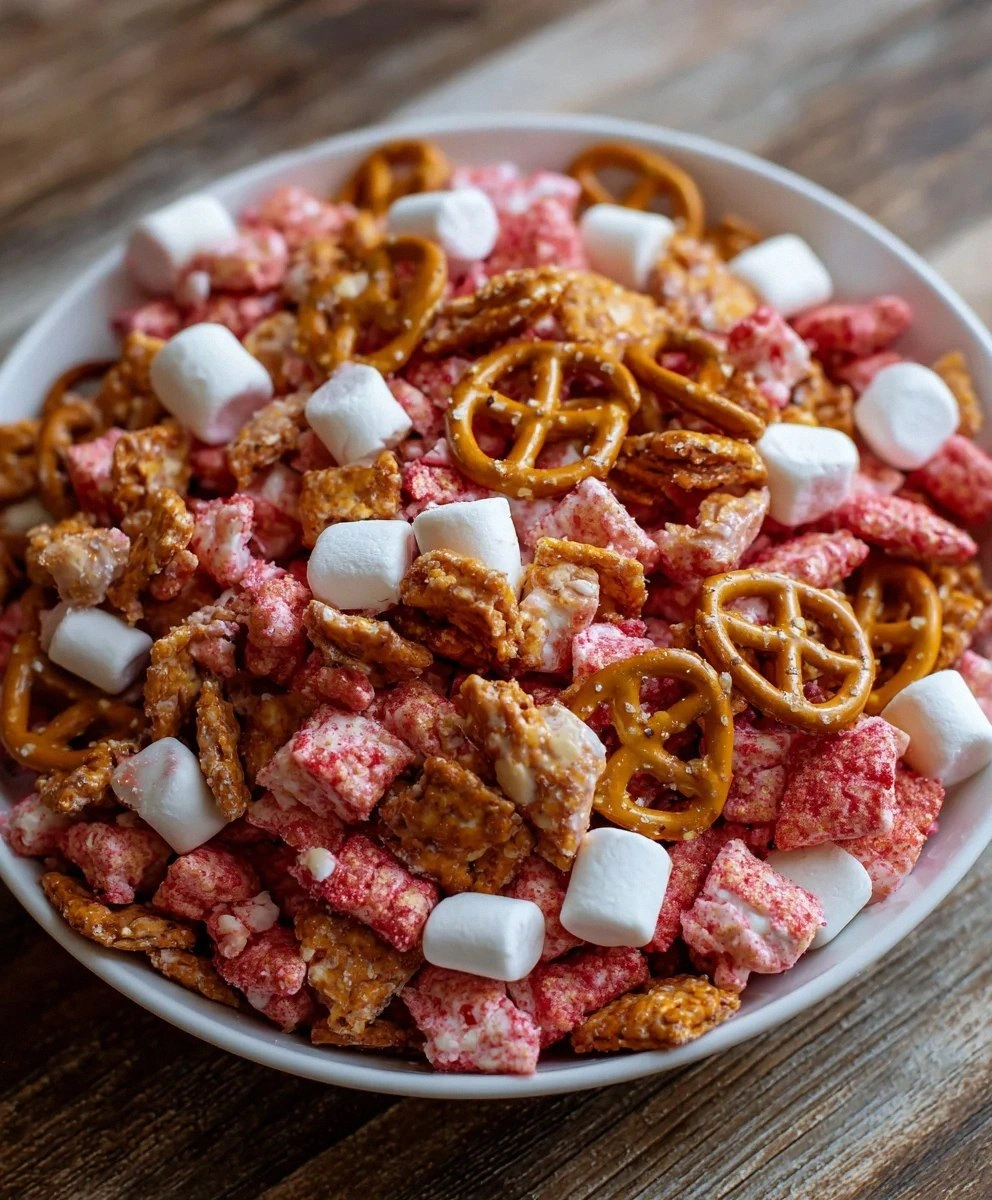
That kitchen disaster led to what I'm convinced is the greatest mashup since peanut butter met jelly. These Strawberry Pretzel Marshmallow Treats take everything you love about those vintage potluck desserts—the salty-sweet magic, the textural playground, the nostalgia factor—and package it into a no-bake bar that even kitchen klutzes can nail on the first try. The pretzels stay shatteringly crisp, the strawberries deliver pure concentrated flavor bombs, and the marshmallows create that stretchy, gooey matrix that makes everyone fight over the corner pieces.
Picture this: buttery pretzel shards suspended in a cloud of vanilla-kissed marshmallow, studded with tart-sweet strawberry crisps that melt on your tongue like fruit-flavored snow. The edges caramelize into a golden crown while the center stays soft and yielding. One bite and you're transported to summer picnics and church basement potlucks, but somehow better—like someone took those memories and turned the saturation dial all the way up. The salt hits first, then the butter, then the sweet strawberry explosion, and finally that marshmallow pull that stretches from your lips to your happy place.
I've made these for birthday parties where they disappeared faster than the cake, for camping trips where they became currency ("I'll trade you two s'mores for one of those strawberry things"), and for midnight snacks when only the perfect combination of salty-sweet-crunchy-gooey will do. My record? Eating six squares while standing at the counter "just checking if they're cool enough to serve." I dare you to taste this and not go back for seconds. Actually, I dare you to make it through the cooling period without sampling at least one corner piece. Let me walk you through every single step—by the end, you'll wonder how you ever made it any other way.
What Makes This Version Stand Out
This isn't your average marshmallow treat wearing a strawberry costume. Oh no, we're building layers of flavor that would make a pastry chef weep with joy. The secret lies in treating each component like it matters—because it does. That means toasting the pretzels until they smell like a movie theater, using real vanilla like your life depends on it, and understanding that freeze-dried strawberries are basically nature's Pop Rocks when they hit warm marshmallow. Most recipes get this completely wrong by treating the mix-ins as afterthoughts, but here's what actually works.
- Salt Balance: Most sweet treats forget that salt is what makes sugar sing. These bars hit that perfect 70/30 sweet-to-salty ratio that keeps you reaching for "just one more piece" until suddenly the pan's empty. The pretzels bring the salt, the butter amplifies it, and a final pinch of kosher salt in the marshmallow mixture makes the strawberry flavor pop like fireworks.
- Texture Symphony: We're talking about a treat that crackles when you bite into it, then gives way to a soft, stretchy center that melts like cotton candy on your tongue. The freeze-dried strawberries rehydrate just enough to become these little jammy pockets, while the crispy rice cereal keeps everything from becoming a sugar bomb of one-note texture.
- Make-Ahead Magic: These actually get better after a day in the fridge—if you can resist them that long. The flavors meld and deepen, the pretzels stay crisp thanks to a butter barrier that keeps moisture at bay, and they cut cleaner for prettier presentation. I've made these three days ahead of parties and watched them disappear faster than the fresh ones.
- Gluten-Free Flexibility: Using gluten-free pretzels doesn't compromise anything here—they're just as salty, just as crunchy, just as perfect for catching all that marshmallow goo. Nobody will know unless you tell them, and honestly, they probably won't care once they taste these.
- No-Bake Brilliance: Summer parties, hot kitchens, or when you just can't deal with preheating an oven—these come together on the stovetop in under fifteen minutes. The hardest part is waiting for them to set, and even that's negotiable if you like your treats on the warm and gooey side.
- Crowd Psychology: There's something about that pink swirl and golden pretzel peeking through that makes people lose their minds. I've seen grown adults elbow children out of the way for the last piece. The combination triggers every pleasure center—childhood nostalgia, sweet tooth satisfaction, and that sophisticated salty edge that makes people feel fancy.
Alright, let's break down exactly what goes into this masterpiece...
Inside the Ingredient List
Every ingredient here pulls its weight and then some. This isn't one of those recipes where you can swap things willy-nilly and expect the same magic to happen. Each component has been tested, tasted, and perfected through what my family now calls "The Summer of Infinite Treats" (they complained, but they also ate everything). Understanding why each ingredient matters will turn you from a recipe follower into a treat-making wizard who can freestyle with confidence.
The Flavor Base
Pretzels aren't just providing crunch—they're the backbone of our flavor profile. When you toast them in butter, something magical happens. The Maillard reaction kicks in, creating hundreds of new flavor compounds that taste like buttered popcorn met a bakery and decided to have a party. Regular or gluten-free both work beautifully here because we're after that salt and that crunch, not the specific wheat flavor. The irregular pieces are crucial—some dust to fill every crevice, some shards for dramatic presentation, and some chunks for those satisfying pretzel-forward bites.
Unsalted butter serves double duty as our toasting medium and our glue. Using unsalted lets us control the salt level perfectly, because pretzels are already bringing plenty to the party. When you melt it down and let it bubble until it smells nutty, you're creating brown butter magic that will haunt your dreams in the best way. Don't rush this step—those extra two minutes of browning transform good treats into legendary ones. And save some for greasing the pan; nothing ruins the unveiling like half your treats clinging to the corners like shipwreck survivors.
Vanilla extract might seem basic, but here's where most people mess up. That bottle that's been in your cabinet since 2019? Toss it. Vanilla loses its potency faster than you think, and in a recipe where it's one of only six ingredients, you need the good stuff. Splurge on the real thing—artificial vanilla tastes like sadness and broken dreams. When you add it to the warm marshmallow mixture, the heat releases all those floral notes that make people ask "what's your secret ingredient?"
The Texture Crew
Mini marshmallows are the undisputed stars of this show, but not all marshmallows are created equal. Fresh, soft marshmallows melt into silky smoothness, while older ones can turn grainy and weird. Here's my test: if you can squish one between your fingers and it springs back like a pillow, you're golden. If it cracks or feels dry, your treats will taste like sugary cardboard. The minis melt faster and more evenly than the jumbo ones, creating that perfect matrix that holds everything together without becoming a tooth-achingly sweet brick.
Crispy rice cereal isn't just filler—it's insurance against density. Those tiny air pockets trapped in each puff create lift and lightness that keeps these from becoming a sugar coma in bar form. Don't even think about substituting with puffed rice or another cereal; they don't have the same structural integrity. The cereal should go in last, folded gently so it keeps some crunch. Over-mixing is the enemy of texture here.
Freeze-dried strawberries are my secret weapon for intense strawberry flavor without the moisture that would turn your pretzels to mush. These little ruby chips are concentrated strawberry essence—ten pounds of fresh berries reduced to one pound of crispy perfection. They rehydrate slightly in the warm marshmallow, becoming these jammy pockets that burst with fruit flavor. Regular dried strawberries won't work; they're too chewy and lack that bright acidity that makes your taste buds dance. If you can't find them, order online or check the snack aisle—they're worth hunting down.
The Final Flourish
Kosher salt isn't optional—it's the difference between a treat that tastes flat and one that makes people close their eyes in pleasure. That final pinch awakens every other flavor, making the strawberry taste fruitier and the butter taste richer. Table salt is too fine and can make things taste metallic; kosher salt's larger crystals provide little bursts of salinity. Sprinkle it on top too, and you'll get these sparkly crunch moments that make people reach for seconds.
Additional mini marshmallows folded in at the end create those signature white pockets that signal "marshmallow treat" to anyone who grew up with Rice Krispies squares. They don't melt completely, staying as soft surprises throughout. This is where you can get creative—throw in some extra for maximum marshmallow pull, or keep it subtle. Either way, don't skip this step; it's what separates amateur treats from professional ones.
Everything's prepped? Good. Let's get into the real action...
The Method — Step by Step
Okay, ready for the game-changer? We're not just melting marshmallows and calling it a day. We're building layers of flavor that start the moment your butter hits the pan and don't stop until the last crumb disappears from the serving plate. This next part? Pure magic. Stay with me here—this is worth it.
- Start by generously buttering a 9x13 inch baking pan with some of your softened butter, making sure to get into every corner and up the sides. Don't be shy here—think of it as insurance policy against stickage. Line the bottom with parchment paper, leaving wings on the sides so you can lift the whole slab out later like a professional. This isn't just for pretty presentation; it ensures every single square comes out intact, which matters when you're fighting off a crowd of dessert vultures. Set this aside and resist the urge to snack on the remaining butter—that nutty aroma coming from your pan is just a preview of coming attractions.
- Place a large, heavy-bottomed pot over medium heat and add four tablespoons of your butter. Let it melt slowly until it starts to foam, then watch closely as the foam subsides and the butter turns golden brown. This takes about 3-4 minutes, and here's where your nose becomes your best friend—that nutty, almost caramel aroma means you've hit the sweet spot. Swirl the pan occasionally so it browns evenly, and the moment you see little brown specks (those are milk solids, and they're packed with flavor), pull it off the heat. This brown butter base is what separates good treats from legendary ones.
- Return the pot to low heat and immediately add your mini marshmallows, stirring constantly with a silicone spatula. This is the moment of truth—marshmallows can go from perfectly melted to a gluey mess faster than a toddler can destroy a clean room. Keep the heat low and be patient; they'll start to puff and soften within a minute. When they're about 80% melted (still some distinct marshmallow shapes but getting soupy), add your vanilla extract. The alcohol will sizzle and steam—this is good! It means the raw alcohol is cooking off, leaving behind pure flavor.
- While your marshmallows are doing their thing, crush your pretzels in a zip-top bag using a rolling pin or heavy pan. You're looking for a mix of sizes—from pretzel dust that will dissolve into the marshmallow matrix to nickel-sized chunks that provide dramatic crunch. Don't overthink it; irregular is beautiful here. The dust helps bind everything together while the chunks give you those Instagram-worthy cross-sections that make people ask for the recipe before they've even tasted one.
- Once your marshmallows are completely smooth and glossy (think melted mozzarella consistency), add your kosher salt and stir well. Remove from heat and immediately fold in your crispy rice cereal using a gentle cutting motion. The cereal should be evenly distributed but still maintain some of its structure—over-mixing crushes the cereal and gives you dense, sad treats. Work quickly but gently; the marshmallow mixture starts setting up as soon as it starts cooling, and you want everything incorporated before that happens.
- Now for the star players: add your crushed pretzels and freeze-dried strawberries all at once. Use a folding motion to distribute them evenly, but don't overdo it—you want the pretzels to stay crispy and the strawberries to remain in distinct pieces. The heat from the marshmallow will slightly rehydrate the strawberries, turning them into these amazing jammy pockets. If you've ever had strawberry shortcake where the berries have macerated just enough to get syrupy, that's the texture we're after here.
- Add your reserved mini marshmallows and fold just enough to distribute them throughout. These will stay mostly whole, creating those signature white pockets that signal serious marshmallow game. The key is working quickly but gently—the mixture should still be warm enough to be pliable but not so hot that it melts your additional marshmallows completely. If it starts to feel stiff, you've waited too long, but don't panic—just press it into the pan with slightly more force.
- Transfer your mixture to the prepared pan and press it evenly into the corners. Don't use all your strength here; you're aiming for even distribution, not concrete density. The top should be relatively smooth but still have some character—think rustic bakery rather than factory-perfect. If you see pretzel pieces poking through, that's perfect—they'll get beautifully toasty and provide visual appeal. Let cool for at least 30 minutes at room temperature, or speed things up in the fridge for 15 minutes if you're impatient (and let's be honest, you are).
- When completely cool, lift the entire slab out using the parchment wings and place on a cutting board. Use a sharp knife dipped in hot water and wiped dry between cuts for the cleanest slices. Cut into 24 pieces for polite company, or 12 for people who understand that life is short and desserts should be generous. The edges will be slightly caramelized and chewy while the centers stay soft and yielding—this textural contrast is what makes people go back for seconds even when they're "full."
That's it—you did it. But hold on, I've got a few more tricks that'll take this to another level...
Insider Tricks for Flawless Results
Here's where we separate the treat-making mortals from the dessert deities. These aren't just suggestions—they're the difference between "these are good" and "I need this recipe tattooed on my arm." Through dozens of batches (and yes, several failures that still got eaten), these are the hard-won secrets that make professionals look like magicians.
The Temperature Rule Nobody Follows
Your marshmallow mixture needs to cool to exactly 140°F before adding your mix-ins. Too hot and your pretzels go soggy, your strawberries disintegrate, and your additional marshmallows melt into sad puddles. Too cool and the mixture becomes stiff and impossible to mix evenly. How do you know it's right? It should feel warm but not hot when you touch the side of the pot, and it should flow like slow lava when you tilt the pan. A friend tried skipping this step once—let's just say it didn't end well, and her treats had the texture of wet cardboard. Buy a cheap instant-read thermometer and thank me later.
Why Your Nose Knows Best
Don't just set a timer for your brown butter—smell is your most reliable indicator here. When it stops smelling like melted butter and starts smelling like toasted nuts and caramel corn, you're in the zone. This usually happens right after the foam subsides and the butter turns golden. The color change happens fast, but the smell change gives you a 30-second warning that's more reliable than any visual cue. I've trained myself to recognize this smell, and now I can brown butter perfectly even when distracted by children, pets, or that Netflix show I'm supposedly not watching while cooking.
The 5-Minute Rest That Changes Everything
After pressing your mixture into the pan, let it rest for exactly five minutes before attempting to smooth the top. The marshmallow mixture needs this time to set up slightly, which means when you go back to tidy things up, you're not creating drag marks or pulling up pretzel pieces. Use a piece of buttered parchment paper to gently press and smooth, creating a surface that's rustic but intentional. This tiny wait prevents the frustration of a top that looks like it was decorated by a toddler having a tantrum.
The Salt Timing That Makes Stars Shine
Add half your salt when the marshmallows are melted and save the other half for sprinkling on top right before they set. This creates layers of salinity—some dissolved into the matrix, some sitting on the surface ready to hit your tongue first. It's like having a salt expert design your flavor profile. The top salt also draws out moisture slightly, creating this delicate crust on the surface that provides textural contrast. Use flaky sea salt if you want to feel fancy, but honestly, kosher salt works perfectly and costs pennies.
Why Cutting Direction Matters More Than You Think
Always cut these in a grid pattern, not random sizes. Why? Because the edge pieces have more caramelized crunch while the center pieces are softer and more marshmallow-forward. By cutting in a grid, you ensure everyone gets a mix of textures instead of fighting over the coveted edges. Plus, uniform pieces mean uniform portion control (ha! as if anyone eats just one). For parties, I cut them smaller—about 1.5-inch squares—because people always want "just a taste" and then come back for more when they realize what they're dealing with.
Creative Twists and Variations
This recipe is a playground. Here are some of my favorite ways to switch things up:
The Chocolate Covered Strawberry
Replace half the pretzels with crushed chocolate-covered pretzels and add 2 tablespoons of cocoa powder to the marshmallow mixture. The result tastes like those fancy chocolate-dipped strawberries you get on Valentine's Day, but with crunch and staying power. Drizzle melted white chocolate on top for extra Instagram points. Kids go crazy for these, and adults pretend they're too sophisticated until you catch them sneaking thirds.
The Tropical Vacation
Swap the freeze-dried strawberries for freeze-dried pineapple and mango, and add 1/2 cup of toasted coconut flakes. These taste like a beach vacation in bar form—the coconut toasts in the warm marshmallow, creating these golden crunchy bits that transport you straight to a tropical island. Add a tiny bit of rum extract (1/2 teaspoon) if you want to get really thematic, but go easy or it tastes like a college party gone wrong.
The Breakfast of Champions
Add 1/4 cup of peanut butter to the melted marshmallow mixture and use honey-roasted pretzels instead of regular ones. These taste like the world's most indulgent peanut butter and jelly sandwich, but portable and socially acceptable to eat for dessert. The peanut butter adds richness that makes these incredibly satisfying, and the honey on the pretzels amplifies the sweet-salty thing to nuclear levels. Pro tip: these are amazing crumbled over vanilla ice cream.
The Holiday Sparkle
Use freeze-dried cranberries instead of strawberries and add 1 teaspoon of orange zest plus 1/4 cup of white chocolate chips. The tart cranberries and bright orange make these taste like holiday memories—perfect for cookie exchanges because they stand out from the usual sugar cookie crowd. The white chocolate chips create these little creamy pockets that balance the tartness. I've had people offer to pay me to make these for their holiday parties, but honestly, they're so easy you should just make them yourself and take all the credit.
The Campfire Classic
Add 1/4 cup of chocolate chips and replace 1 teaspoon of vanilla with 1 teaspoon of smoked salt. These capture everything you love about s'mores—the chocolate melty pockets, the marshmallow pull, the graham cracker vibe from the cereal—but with a sophisticated smoky edge that makes them taste like they came from a trendy dessert bar. The smoked salt is subtle but adds this depth that makes people ask "what is that amazing flavor?" It's campfire nostalgia for grown-ups who appreciate complexity in their nostalgia.
The Birthday Cake Remix
Use birthday cake-flavored pretzels (they exist, and they're magical) and add 1/4 cup of rainbow sprinkles to the mixture. These are like someone turned a birthday party into a treat—fun, colorful, and guaranteed to make people smile. The sprinkles add color and a slight crunch that kids absolutely love. I've made these for actual birthday parties instead of cake, and nobody complained—though they did fight over the pieces with the most sprinkles, which is why I now add extra on top.
Storing and Bringing It Back to Life
Here's the thing about these treats—they're best within the first 24 hours when the pretzels are at peak crunch and the marshmallow is perfectly soft. But that doesn't mean leftovers (if you have any) are a lost cause. With the right storage tricks, you can maintain that fresh-made magic for days, and I've even frozen batches that tasted almost as good as fresh when properly revived.
Fridge Storage
Store in an airtight container with parchment paper between layers for up to 5 days. The fridge actually helps them hold their shape better in warm weather, though it does make the pretzels slightly less crisp. Here's the trick: add a piece of bread to the container. The bread absorbs excess moisture that would otherwise make your treats soggy, and you can replace it every couple of days. Bring to room temperature for 30 minutes before serving for the best texture. I've successfully served 4-day-old treats to guests who had no idea they weren't fresh from the pan.
Freezer Friendly
These freeze beautifully for up to 2 months if you wrap them right. Cut into squares, wrap each piece individually in plastic wrap, then place in a freezer bag. When you're ready to eat, let them thaw at room temperature for about an hour—they'll taste almost as good as fresh. The key is preventing freezer burn, which kills the delicate strawberry flavor. I've made batches specifically to freeze for emergency dessert situations, and they've saved me more times than I can count when unexpected guests show up or late-night cravings strike.
Best Reheating Method
If your treats have been in the fridge and taste a little too firm, give them a 10-second zap in the microwave. Not 15 seconds—exactly 10. This softens the marshmallow without melting the pretzels or turning everything into a sticky mess. You can also warm them in a 300°F oven for 3-4 minutes, which actually brings back some of that fresh-from-the-pan magic. Add a tiny splash of water before reheating—it steams back to perfection and prevents the edges from getting too crisp while the center stays soft and yielding.