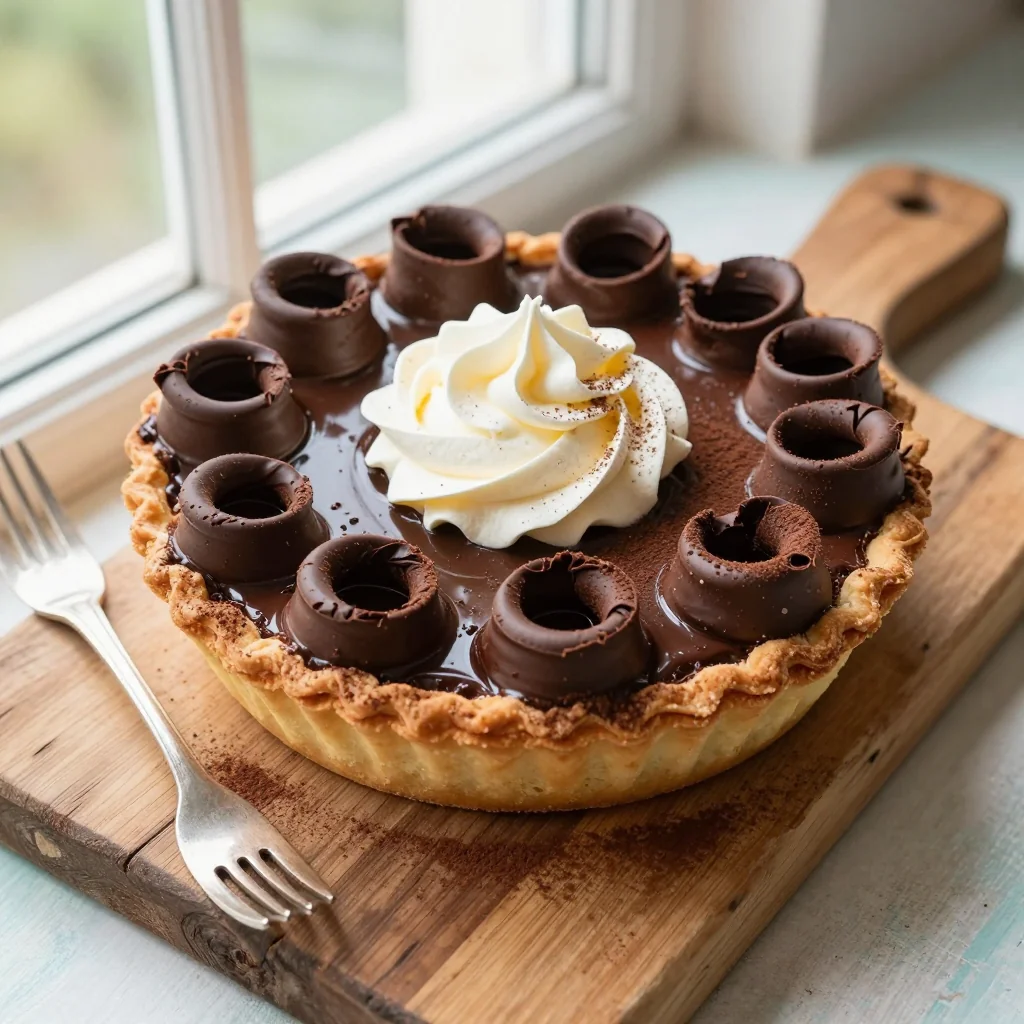
A velvety chocolate silk pie crowned with delicate, hand‑rolled chocolate curls that melt in your mouth.

I still remember the first time I tasted a silk pie at a small Parisian pâtisserie on a rainy afternoon. The glossy, dark chocolate filling was so smooth it seemed to glide across the palate, while a whisper of buttery crust provided the perfect contrast. That moment sparked a lifelong fascination with the balance of texture and flavor that defines classic French desserts. Since then, I’ve experimented countless times, tweaking techniques and ingredients, always chasing that same silky perfection.
French Silk Pie, originally popularized in the United States during the 1960s, draws inspiration from the French tradition of rich, mousse‑like confections. Its hallmark is the airy, mousse‑style chocolate filling that requires no gelatin, relying instead on the emulsifying power of butter and the aeration of eggs. Adding homemade chocolate curls elevates the pie from a simple dessert to a show‑stopping centerpiece, offering a delightful crunch that juxtaposes the silkiness.
In this guide, I’ll walk you through every step—from creating a buttery chocolate cookie crust to mastering the glossy, glossy filling, and finally, rolling your own chocolate curls. You’ll learn the science behind the perfect emulsion, how to avoid common pitfalls like a grainy texture, and tricks for achieving glossy curls that hold their shape.
So preheat your oven, gather your tools, and let’s embark on a delicious journey that will impress both your family and your guests. Ready? Let’s get baking!
🌟 Why This Recipe Will Capture Your Heart
This French Silk Pie isn’t just a dessert; it’s an experience that blends elegance, flavor, and texture in every bite.
- ✨ Unmatched Silky Texture: The combination of melted butter and gently folded egg yolks creates a mousse‑like consistency that feels luxurious on the tongue.
- ✨ Show‑Stopping Presentation: Hand‑rolled chocolate curls add a professional garnish that turns a simple slice into a visual masterpiece.
- ✨ Simple Ingredient List: Only pantry staples and high‑quality chocolate are needed, making it accessible without compromising on taste.
- ✨ Versatile for Any Occasion: Whether it’s a holiday dinner, a birthday celebration, or an intimate dinner for two, this pie fits every setting.
- ✨ Balanced Sweetness: The addition of a pinch of sea salt enhances the chocolate’s depth, preventing cloying sweetness.
- ✨ Fun Interactive Portion Control: Our built‑in portion adjuster lets you scale the recipe up or down without re‑calculating every measurement manually.
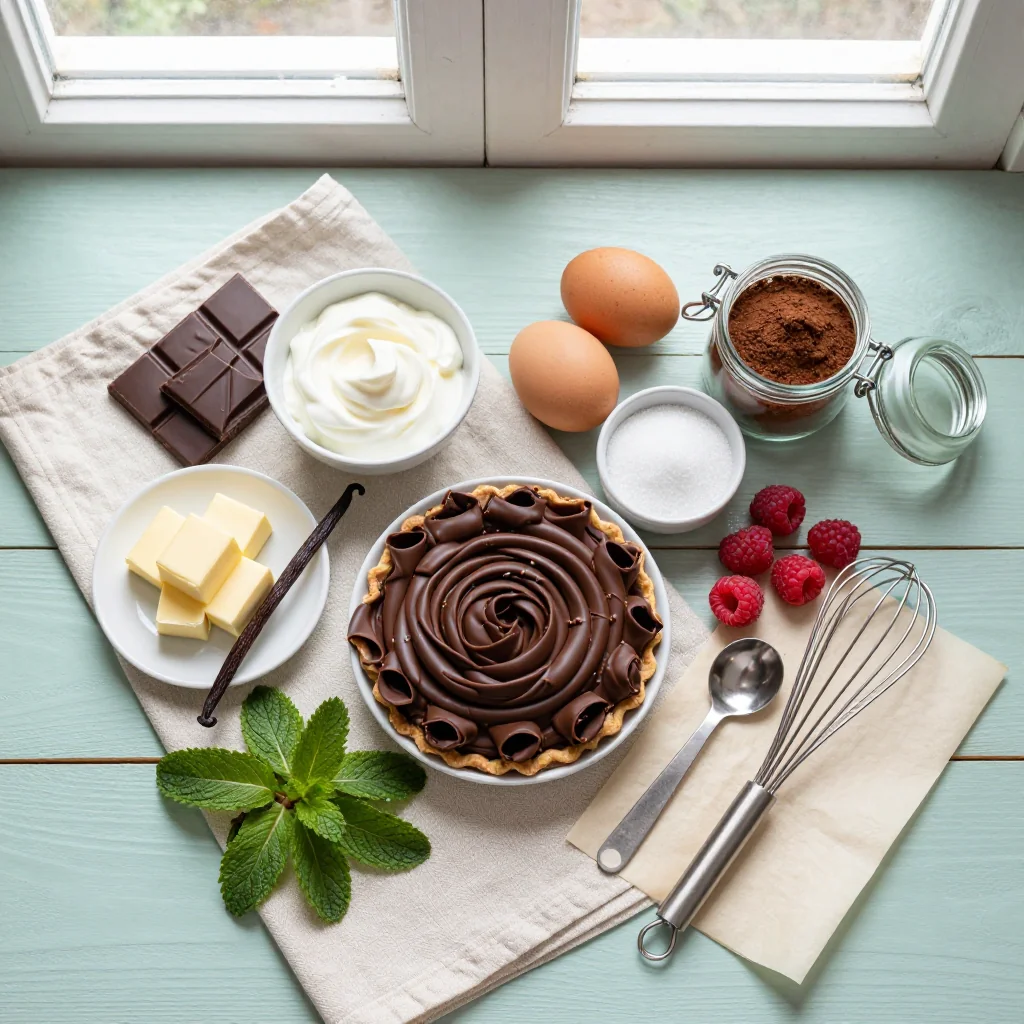
🥗 Ingredients
📝 Complete Ingredient List
For the Chocolate Crust:
For the Silk Filling:
For Homemade Chocolate Curls:
Optional Whipped Cream Topping:
🔍 Focus on Key Ingredients
Dark Chocolate (70% cocoa)
High‑cocoa dark chocolate provides the deep, bittersweet backbone of the pie. Look for chocolate with a glossy snap when broken; this indicates a high-quality cocoa butter content, essential for a smooth, glossy finish. The cocoa solids also contribute antioxidants, making this indulgent treat a little healthier.
Unsalted Butter
Butter acts as both an emulsifier and a flavor carrier. Using unsalted butter allows precise control over the final salt level, ensuring the subtle sea‑salt pinch enhances rather than overwhelms the chocolate. For the crust, melted butter binds the cookie crumbs into a firm base that holds up to the filling.
Eggs
The separation of yolks and whites is crucial. Yolks enrich the filling, while stiffly beaten egg whites introduce air, creating the signature silkiness. Fresh, room‑temperature eggs whip more easily and produce a stable foam, which is why we let them sit out for 30 minutes before starting.
🔄 Quick Substitutions
| If you don’t have... | Use instead... |
|---|---|
| Chocolate wafer cookies | Graham crackers (slightly sweeter) |
| Unsalted butter | Salted butter (reduce added salt by 1/4 tsp) |
| Dark chocolate 70% | Bittersweet chocolate 60‑65% cocoa |
👨🍳 Step‑by‑Step Instructions
Follow these detailed steps to create a flawless French Silk Pie that will wow every palate.
📋 Phase 1: Preparation and Mise en Place
Gather your tools, preheat the oven, and prepare each component before you begin mixing.
Prepare the crust
Place the chocolate wafer cookies in a food processor and pulse until they form fine crumbs. Transfer the crumbs to a mixing bowl, add the melted butter, and stir until the mixture resembles wet sand. Press the crumb mixture evenly into the bottom and slightly up the sides of a 9‑inch (23 cm) springform pan, using the back of a spoon to create a compact layer. Chill the crust in the refrigerator while you work on the filling.
Separate the eggs
Separate the egg whites from the yolks, placing yolks in a large mixing bowl and whites in a clean, dry bowl. Ensure no yolk contaminates the whites, as even a small amount of fat can prevent the whites from reaching stiff peaks. Let the whites sit for a few minutes while you melt the chocolate.
Melt the chocolate
Using a double‑boiler or microwave in 20‑second bursts, melt the 200 g of dark chocolate until smooth. If using a microwave, stir after each burst to avoid scorching. Once melted, let the chocolate cool slightly—aim for a temperature around 45 °C (113 °F) before combining with the butter.
🔥 Phase 2: Filling and Assembly
Create the silky chocolate filling and fold in airy egg whites.
Combine chocolate, butter, and yolks
In a heat‑proof bowl set over a pot of simmering water, whisk together the melted chocolate, softened butter, and egg yolks until the mixture is glossy and fully combined. Remove from heat and stir in vanilla extract, granulated sugar, and sea salt. The mixture should be smooth and slightly thickened.
Whisk egg whites to stiff peaks
Using a clean electric mixer, beat the egg whites on medium speed until they become foamy. Gradually add the granulated sugar while continuing to beat, then increase to high speed until stiff, glossy peaks form. The sugar stabilizes the foam, giving the filling its lightness.
Fold whites into chocolate mixture
Using a large rubber spatula, gently fold a third of the beaten egg whites into the chocolate mixture to lighten it. Then fold in the remaining whites in two additions, turning the bowl over each time. Avoid over‑mixing; the goal is to keep the air bubbles intact for that silk‑smooth texture.
Fill the crust and chill
Pour the silky chocolate filling over the chilled crust, smoothing the top with an offset spatula. Tap the pan lightly on the countertop to release any trapped air bubbles. Cover the springform pan with plastic wrap and refrigerate for at least 4 hours, preferably overnight, to allow the filling to set firmly.
✨ Phase 3: Finishing Touches and Serving
Create chocolate curls, add optional whipped cream, and present the pie.
Make chocolate curls
Finely chop the remaining 100 g of dark chocolate. Using a vegetable peeler, run it over a chilled chocolate block to create thin, elegant curls. If the chocolate is too soft, chill it in the freezer for 10 minutes before peeling. Set curls aside on parchment paper.
Optional whipped cream
In a chilled bowl, whip the heavy cream with powdered sugar until soft peaks form. Spread a thin layer of whipped cream over the set chocolate filling, then gently press chocolate curls onto the surface for an artistic garnish.
Serve
Remove the springform side, slice the pie with a hot, wet knife for clean cuts, and serve chilled. Pair each slice with a glass of chilled Pinot Noir or a sparkling water infused with a slice of orange for a refreshing contrast.
💡 Expert Tips and Tricks
🛒 Choosing the Right Ingredients
Select a chocolate that lists cocoa butter as the first ingredient; this ensures a glossy melt and a smooth mouthfeel. When buying butter, opt for European‑style butter with a higher fat content (82%+) for richer flavor. For the crust, avoid overly sweet cookies; a slight bitterness balances the sweet filling.
🔪 Preparation Techniques
Always bring the eggs to room temperature before separating; this makes the whites more pliable and easier to whip. When folding, use a gentle “cut‑and‑turn” motion to preserve air bubbles. A silicone spatula is ideal because it flexes without tearing the airy mixture.
🌡️ Mastering the Cooking Process
The filling never actually cooks on the stove; it sets through cooling. However, the chocolate must be cooled to the right temperature before adding butter and yolks to avoid curdling. Use an instant‑read thermometer to keep the chocolate between 40‑45 °C (104‑113 °F) for optimal emulsification.
🍽️ Presentation and Service
For a professional look, run a hot, damp knife through the pie before each cut. This creates a clean edge and prevents the filling from sticking. Garnish with a dusting of edible gold leaf or a pinch of flaky sea salt for an extra touch of elegance.
🏆 Pro Tips
Elevate your pie from great to restaurant‑quality with these insider secrets.
- 🎯 Control the Butter Temperature: Softened butter should be just barely warm to the touch (around 20 °C). If it’s too warm, it will separate from the chocolate, leading to a grainy texture. Conversely, cold butter won’t blend smoothly, causing lumps.
- 🎯 Use a Double Boiler for Chocolate: This gentle heat prevents scorching and maintains the chocolate’s temper, which is essential for a glossy, snap‑ready finish on the curls.
- 🎯 Stabilize Egg Whites with Cream of Tartar: Adding a pinch (1 g) of cream of tartar boosts foam stability, especially useful in humid kitchens where whites can become watery.
- 🎯 Chill the Pie Before Cutting: A firm set (minimum 4 hours) ensures clean slices. If you’re short on time, place the pie in the freezer for 20 minutes to firm up quickly without freezing the texture.
- 🎯 Make Curls Ahead of Time: Chocolate curls harden quickly; prepare them up to 24 hours in advance and store in an airtight container with a silica packet to keep them crisp.
- 🎯 Finish with a Light Glaze: Warm a tablespoon of cocoa butter and brush it lightly over the curls just before serving for an extra sheen that catches the light beautifully.
"A perfect silk pie is not just about flavor; it’s about the texture that melts on the tongue and the visual drama of chocolate curls." — Jacques Pépin
🔄 Variations and Adaptations
This classic French Silk Pie can be tailored to suit dietary preferences, seasonal flavors, or adventurous palates.
🥬 Vegetarian / Vegan Version
Replace butter with a high‑quality plant‑based margarine and use aquafaba (the liquid from canned chickpeas) in place of egg whites. For the yolk component, substitute with silken tofu blended with a touch of soy milk and vanilla. The result is a creamy, dairy‑free silk pie that still boasts deep chocolate flavor.
- Vegan butter (100 g) instead of unsalted butter.
- 1/4 cup aquafaba (≈60 ml) replaces 4 egg whites.
- 150 g silken tofu blended with 2 tbsp soy milk replaces the yolks.
🌶️ Flavor Variations
Play with complementary flavors to create unique twists on the classic recipe.
Spicy Chili Chocolate:
Add ½ tsp finely ground cayenne pepper to the melted chocolate for a subtle heat that awakens the palate.
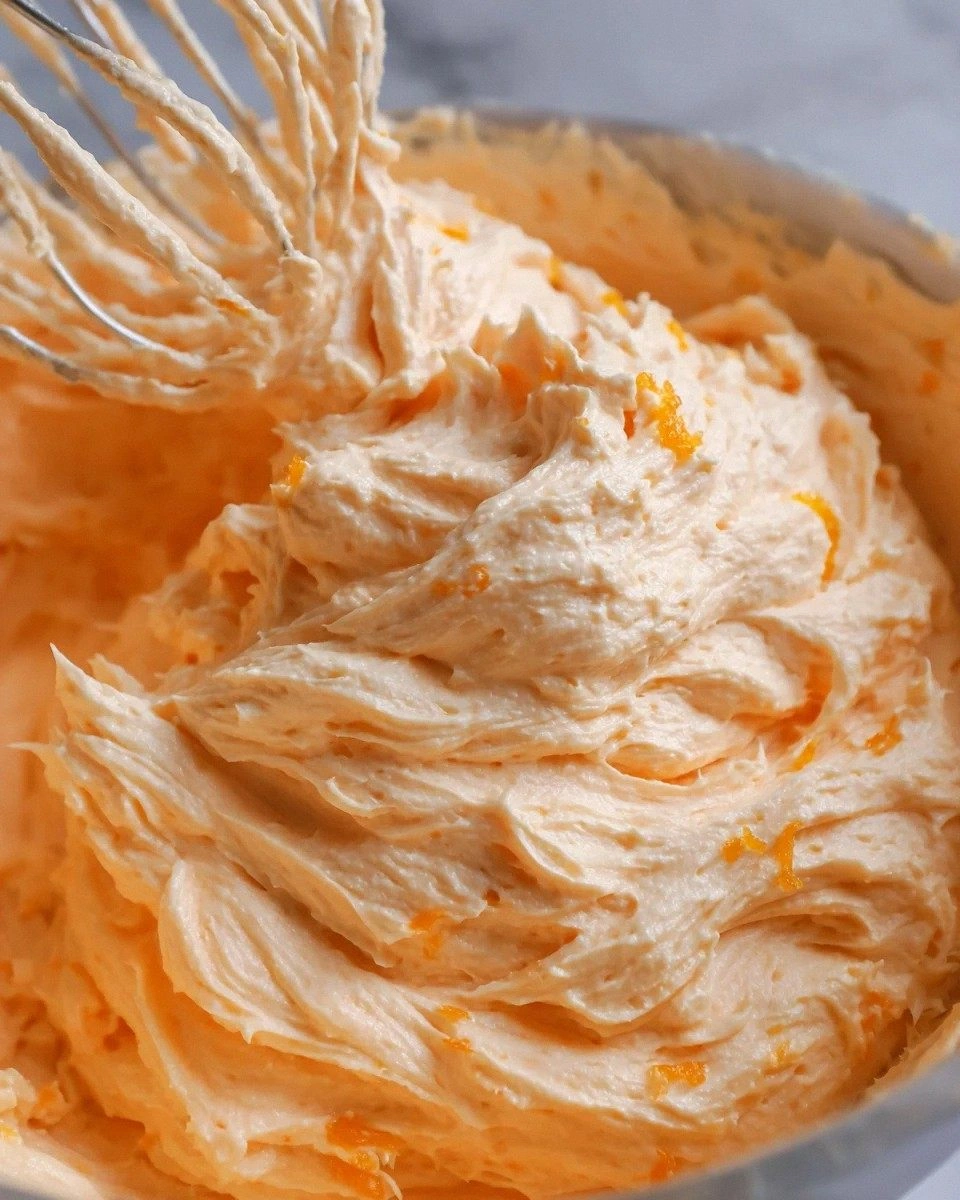
Mediterranean Orange‑Infused:
Stir 1 tbsp orange zest and a splash of Grand Marnier into the chocolate filling for a fragrant, citrusy note.
Asian Matcha Twist:
Mix 1 tsp high‑grade matcha powder into the whipped cream topping, providing a gentle bitterness that balances the chocolate.
⚠️ Dietary Adaptations
Gluten‑Free:
Use gluten‑free chocolate cookies or finely ground almond meal for the crust. Ensure all chocolate is certified gluten‑free.
Lactose‑Free:
Swap butter for lactose‑free margarine and use coconut cream instead of heavy cream for the topping.
Low‑Calorie:
Reduce sugar to 70 g, use 70 % cocoa chocolate (less sugar), and replace half the butter with a light olive‑oil‑based spread.
👶 Kid‑Friendly Version
For younger palates, lower the cocoa percentage to 55 % and add a swirl of strawberry puree into the filling before chilling. Top with colorful sprinkles instead of chocolate curls for a fun, festive look.
📦 Storage and Reheating
🧊 Conservation
Refrigerator:
- Duration: Up to 5 days
- Recommended container: Airtight glass pie dish
- Tip: Cover the top with plastic wrap to prevent the chocolate surface from absorbing fridge odors.
Freezer:
- Duration: Up to 2 months
- Method: Wrap the entire pie tightly in two layers of cling film, then place in a freezer‑safe container.
- Defrosting: Transfer to the refrigerator overnight, then let sit at room temperature for 20 minutes before serving.
💡 For best texture, avoid refreezing once thawed; the delicate mousse may lose its silkiness.
♨️ Reheating
Oven (Recommended):
- Preheat to 150 °C (300 °F).
- Cover the pie loosely with aluminum foil.
- Heat for 10‑12 minutes, until the topping is soft.
- Remove foil and heat an additional 2‑3 minutes if you prefer a slightly warm center.
Microwave (Quick):
- Place a slice on a microwave‑safe plate.
- Cover with a microwave‑safe lid or another plate.
- Heat on medium power for 30‑45 seconds.
- Check and repeat in 10‑second bursts if needed.
Stovetop:
Gently warm a slice in a non‑stick skillet over low heat, covered, for 2‑3 minutes. This method keeps the crust crisp while softening the filling.
🍷 Perfect Pairings
🥗 Accompaniments
- Fresh Berries: A handful of raspberries adds a bright acidity that cuts through the richness.
- Light Citrus Salad: Thinly sliced orange and fennel with a drizzle of honey provides a refreshing contrast.
- Salted Caramel Sauce: Drizzle sparingly for an indulgent sweet‑salty balance.
🍷 Wine & Beverage Pairings
- Pinot Noir (Burgundy): Its soft tannins and red‑fruit notes complement the dark chocolate without overwhelming it.
- Late Harvest Riesling: The natural sweetness mirrors the pie’s richness while adding a floral aroma.
- Non‑Alcoholic: Sparkling water infused with a slice of blood orange offers a palate‑cleansing fizz.
🍰 Completing the Meal
Begin with a light citrus vinaigrette salad, follow with the silk pie as the centerpiece, and finish with a petite cheese plate featuring a soft brie and a drizzle of honey. The progression from bright to rich ensures a harmonious dining experience.
❓ Frequently Asked Questions
Q: Can I use milk chocolate instead of dark chocolate?
Yes, you can substitute milk chocolate, but the pie will be sweeter and less intense. To balance the extra sugar, reduce the added granulated sugar by about 20 g and consider adding a pinch more sea salt.
Q: How do I prevent the chocolate from seizing when melting?
Keep moisture away from the chocolate. Use a dry double boiler, stir gently, and avoid overheating. If a small amount of water does get in, the chocolate will seize; you can rescue it by adding a teaspoon of vegetable oil and stirring until smooth.
Q: My egg whites won’t reach stiff peaks. What’s wrong?
Ensure the bowl and whisk are completely clean and free of any fat. Using a copper bowl can also help stabilize the foam. Adding a pinch of cream of tartar (about 1 g) dramatically improves peak formation.
Q: The filling turned grainy. How can I fix it?
Graininess usually results from the chocolate being too hot when combined with butter or eggs. Let the melted chocolate cool to the proper temperature (around 45 °C) before mixing. If it happens, gently re‑heat the mixture over a double boiler while whisking continuously until smooth.
Q: Can I make this pie in advance for a party?
Absolutely. Prepare the crust and filling a day ahead, keep the assembled pie refrigerated, and add the chocolate curls just before serving to maintain their crisp texture.
Q: How do I scale the recipe for a larger crowd?
Use the portion adjuster in the recipe card (see below) to increase servings from the original 8 up to 20. The JavaScript will automatically recalculate each ingredient based on the new serving count.
🎉 Let’s Get Baking!
This French Silk Pie with Homemade Chocolate Curls embodies the perfect marriage of silky smoothness and elegant garnish. From the buttery chocolate crust to the airy mousse filling and the glossy curls, every element is designed to delight the senses. Whether you’re preparing it for a festive dinner or a quiet evening treat, the recipe’s balance of flavors and textures will leave a lasting impression.
I encourage you to experiment with the variations, share your beautiful creations on social media, and let the community know how you made it your own. Your feedback helps us refine the recipe and inspires other home chefs.
Have you tried this recipe?
Leave a comment and rating below! Share your photos on Instagram with #SilkPieDelight for a chance to be featured.
French Silk Pie with Homemade Chocolate Curls
A velvety chocolate silk pie crowned with delicate chocolate curls.
📝 Ingredients
Chocolate Crust
Silk Filling
Chocolate Curls
Optional Whipped Cream
👨🍳 Instructions
- 1
Process the chocolate wafer cookies into fine crumbs, mix with melted butter, and press into a 9‑inch springform pan. Chill.
- 2
Separate eggs, keep yolks and whites in separate bowls.
- 3
Melt dark chocolate gently; let cool to ~45 °C.
- 4
Whisk melted chocolate with softened butter and egg yolks; add vanilla, sugar, and salt.
- 5
Beat egg whites with a pinch of cream of tartar and sugar to stiff peaks.
- 6
Fold a third of the whites into the chocolate mixture, then fold in the rest.
- 7
Pour filling into crust, smooth top, cover, and refrigerate 4 hours or overnight.
- 8
Create chocolate curls using a peeler on chilled chocolate.
- 9
Optional: whip cream with powdered sugar, spread over set filling, and garnish with curls.
- 10
Slice with a hot, wet knife, serve chilled, and enjoy.
🥗 Nutritional Information (per serving)
*Values are approximate and based on standard ingredient brands.
📚 You Might Also Like
Classic Chocolate Mousse
Raspberry Almond Tart
Red Velvet Cake


💬 Comments & Reviews
Leave a Comment
No comments yet. Be the first to share your thoughts!