I was in the middle of a frantic Saturday morning when my roommate dared me to bake something that would make even the most die‑hard dairy lover question their life choices. I stared at the empty countertop, the silence broken only by the occasional clink of a spoon against a bowl, and thought, “What if I could create a jam tart that feels like a hug from the inside and a fireworks show on the tongue?” That thought turned into a full‑blown kitchen experiment, and let me tell you, the first batch was a glorious mess of buttery crumbs and raspberry explosions. I’m still haunted by the memory of that first bite—so buttery it practically sang, so sweet it whispered secrets of summer berries, and the crust? It crunched like fresh snow under a winter boot, but with a melt‑in‑your‑mouth tenderness that made me question every pastry I’d ever known.
The kitchen was a symphony of sounds: the whirr of the mixer, the soft thud of the butter as it softened, and that unmistakable sizzle when the dough hit the hot pan—like a tiny fireworks display in a miniature arena. The aroma? Imagine a field of wild raspberries after a light rain, mingling with the warm, nutty scent of toasted flour. My senses were on overdrive, and I could already taste the contrast between the crisp edges and the jammy heart. I dared myself to push the boundaries of vegan baking, swapping out traditional butter for a block that behaves like a dream, and adding a secret touch of cornstarch that gives the crust a silk‑like finish.
Most jam tart recipes out there either end up soggy, overly sweet, or just plain bland. I’ve tried the “quick fix” versions that use store‑bought pastry dough, and they never quite hit the mark. This version, however, is hands down the best version you’ll ever make at home because every component is engineered for texture, flavor, and that wow factor that makes people ask for the recipe before the first bite is even taken. I’m being honest— I ate half the batch before anyone else got a chance to try it, and that’s a confession I’m not ashamed of. If you’ve ever struggled with a soggy base or a jam that overpowers the crust, you’re not alone, and I’ve got the fix.
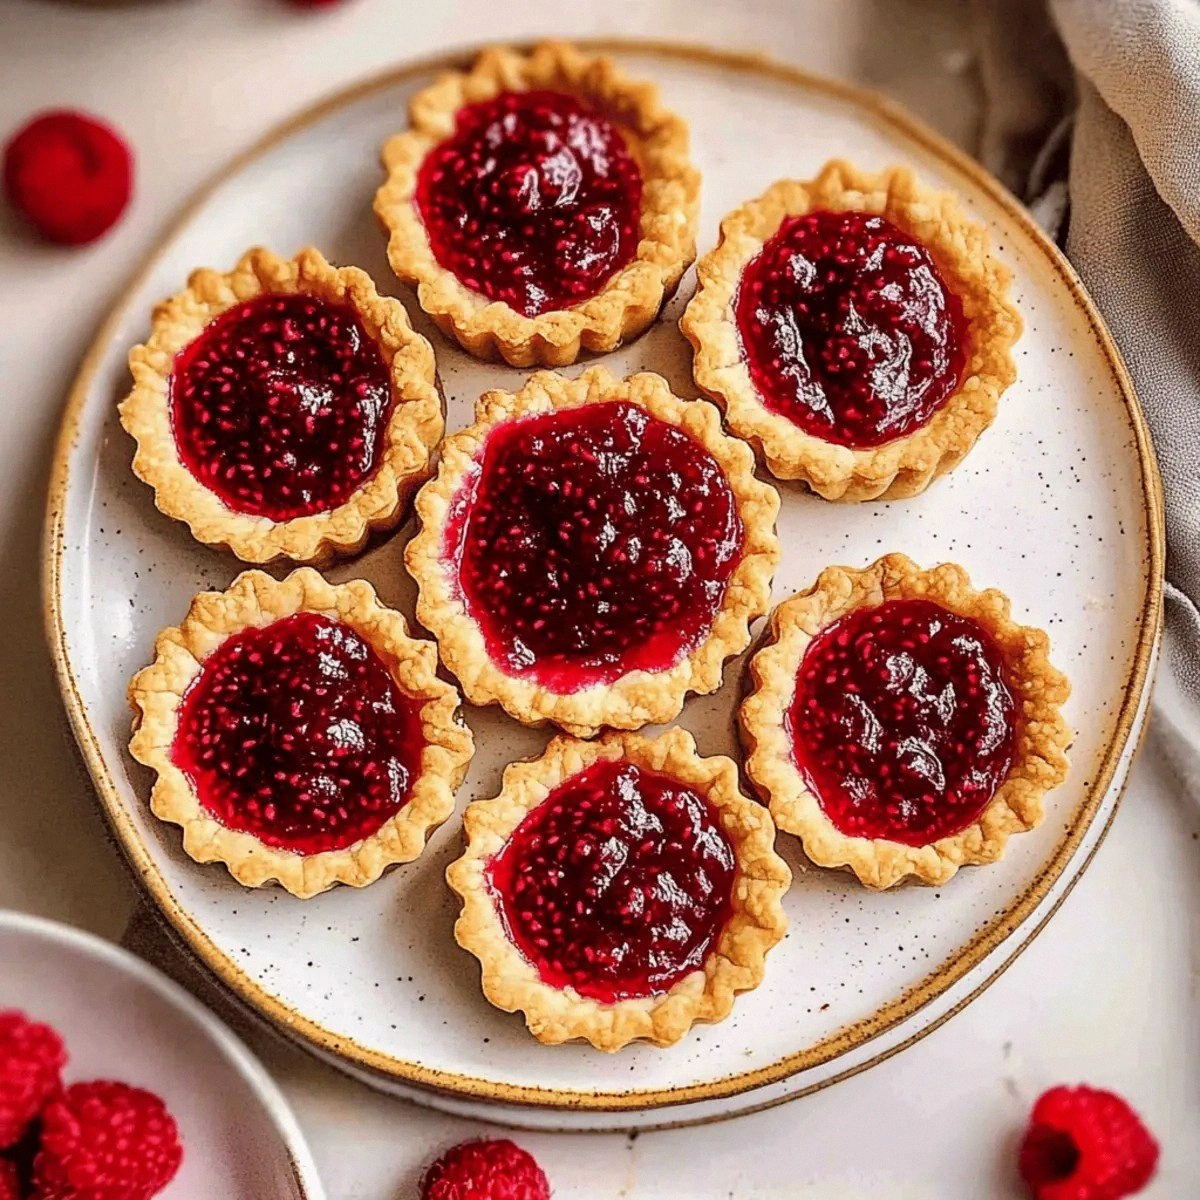
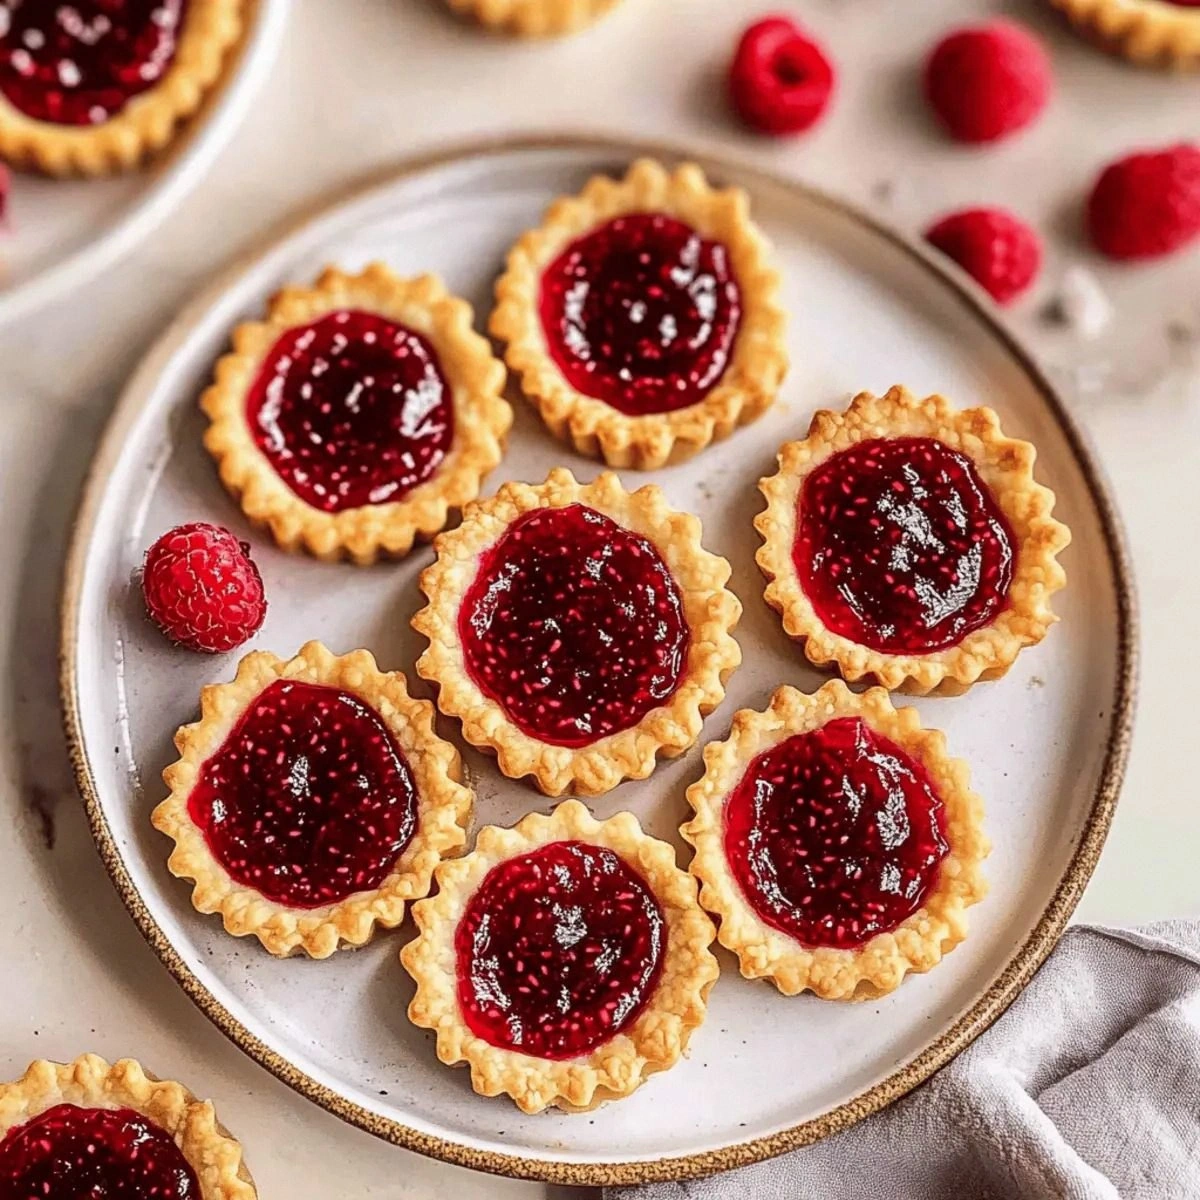
Picture yourself pulling these golden‑brown tarts out of the oven, the whole kitchen smelling like a summer market wrapped in a buttery blanket. The jam glistens like tiny rubies, the crust has that perfect, buttery sheen, and you’re about to bite into a piece of pure comfort. I dare you to taste this and not go back for seconds. Okay, ready for the game‑changer? Let me walk you through every single step — by the end, you’ll wonder how you ever made it any other way.
What Makes This Version Stand Out
- Flavor Explosion: The fresh raspberries are sweetened just enough to let their natural tartness shine, creating a balanced bite that sings.
- Texture Harmony: A buttery, crumbly crust that shatters like thin ice, yet stays tender enough to melt in your mouth.
- Simplicity Meets Sophistication: Only six ingredients, but each one is treated with the respect of a Michelin‑star kitchen.
- Vegan Confidence: No hidden dairy, no compromise—just plant‑based bliss that even non‑vegans will adore.
- Crowd‑Pleaser: These tarts disappear at parties faster than you can say “more jam, please.”
- Ingredient Quality: Using a high‑quality vegan block butter gives you that authentic richness you’d expect from traditional butter.
- Cooking Method: The blind‑bake technique ensures a dry, crisp shell that holds the jam without getting soggy.
- Make‑Ahead Magic: You can prep the crust a day ahead, store it, and finish the tarts right before serving for ultimate convenience.
Inside the Ingredient List
The Flavor Base
Raspberries: Fresh, plump raspberries are the heart of this tart. Their natural acidity cuts through the sweetness of the powdered sugar, delivering a bright, summery note that dances on the palate. If you skip them, you lose the signature “jammy pop” that makes these tarts unforgettable. For a deeper flavor, consider gently macerating the berries with a splash of lemon juice before cooking.
The Texture Crew
All‑Purpose Flour: The backbone of any good pastry, flour provides structure. Using a fine, unbleached variety ensures a tender crumb without any gritty aftertaste. If you substitute with whole‑wheat flour, expect a nuttier flavor but a denser texture—great for a rustic twist, but not for the classic melt‑in‑your‑mouth feel.
Vegan Block Butter: This is the secret weapon. A high‑fat, low‑water butter mimics traditional dairy butter’s ability to create flaky layers. Choose a brand that’s 80%+ fat for the best result. If you only have soft margarine, the crust will be softer and less crisp, so it’s worth the extra trip to the store.
The Unexpected Star
Powdered Sugar: Adds sweetness without the gritty texture of granulated sugar. It also helps the crust achieve a delicate, almost melt‑in‑the‑mouth finish. Skipping it or using too much can lead to a crust that’s either bland or overly sweet, so stick to the measured amount.
Cornstarch: This tiny powder is the unsung hero that keeps the crust tender. It absorbs excess moisture from the butter, preventing a soggy base. If you omit it, the crust may become dense and heavy, especially with the juicy raspberry filling.
The Final Flourish
Water (as needed): Just enough to bring the dough together without turning it into a paste. The amount varies depending on the humidity of your kitchen, so add it tablespoon by tablespoon. Too much water and you’ll have a sticky mess; too little and the dough will crumble before it even hits the oven.
Everything's prepped? Good. Let’s get into the real action…
The Method — Step by Step
First, combine the flour, powdered sugar, and cornstarch in a large mixing bowl. I like to whisk them together for about 30 seconds—this aerates the mixture and ensures the cornstarch is evenly distributed. The dry mixture should look like fine sand, pale and ready to embrace the butter. Tip: If you see any clumps, sift the dry ingredients again.
Now, cut the cold vegan butter into small cubes and add them to the dry mix. Using a pastry cutter or your fingertips, work the butter into the flour until the mixture resembles coarse crumbs with occasional pea‑sized butter pieces. This is the moment where you can feel the dough turning buttery in your hands—like a miniature snowstorm of flavor.
Kitchen Hack: Freeze the butter cubes for an extra 10 minutes after cutting; it makes the cutting process smoother and yields a flakier crust.Add water, one tablespoon at a time, mixing gently with a fork until the dough just comes together. You’ll notice the dough starts to clump; that’s a good sign. It should feel slightly tacky but not sticky—think of a beach sandcastle that holds together when pressed. If the dough feels dry, add another splash of water, but be careful not to over‑hydrate.
Wrap the dough in plastic wrap and refrigerate for at least 30 minutes. This resting period lets the gluten relax and the butter firm up, which is crucial for a tender, flaky crust. While you wait, you can start preparing the jam. The anticipation builds—trust me, the wait is part of the magic.
While the dough chills, place the raspberries in a saucepan over medium heat. Sprinkle a pinch of powdered sugar (optional) and let them simmer, stirring occasionally. As they break down, the mixture will turn into a glossy jam that coats the spoon like velvet. Watch Out: Keep the heat moderate; high heat can cause the berries to burst too quickly and turn mushy.
Watch Out: Over‑cooking the jam can make it too thick, leading to cracks in the tart once it cools. Remove from heat as soon as it reaches a syrupy consistency.Preheat your oven to 375°F (190°C). Lightly flour a clean surface and roll out the chilled dough to about ¼‑inch thickness. Using a 3‑inch tart pan or a cookie cutter, cut out circles and gently press them into a silicone muffin tin, ensuring the edges are even. The crust should be about 2‑3 mm thick at the bottom—thin enough to bake quickly but sturdy enough to hold the jam.
Blind‑bake the crusts for 10‑12 minutes. To prevent puffing, line each tart shell with parchment paper and fill with baking beans or rice. This step creates a dry, sturdy base that won’t soak up the jam later. You’ll hear a faint crackle as the edges start to turn golden—listen for that, it’s the sound of perfection.
Remove the blind‑bake weights and parchment, then spoon a generous tablespoon of warm raspberry jam into each crust. Spread it just to the edge, leaving a tiny border for the crust to shine. Return the tarts to the oven for another 8‑10 minutes, allowing the jam to set and the crust to finish browning. The tops should be lightly caramelized, and the aroma will fill the kitchen like a summer sunrise.
Let the tarts cool in the pan for five minutes, then transfer them to a wire rack. As they cool, the jam will thicken, creating a glossy glaze that catches the light. Serve warm or at room temperature—either way, the buttery crust will still crackle under your fork, and the jam will burst with juicy sweetness. And now the fun part: drizzle a tiny drizzle of agave or a dusting of powdered sugar for that extra sparkle.
That's it — you did it. But hold on, I've got a few more tricks that'll take this to another level…
Insider Tricks for Flawless Results
The Temperature Rule Nobody Follows
Never bake a tart crust from a warm dough. The butter needs to be cold, and the oven must be fully preheated. If you slide a lukewarm crust into a 350°F oven, the butter melts too quickly, resulting in a greasy, soggy base. I once tried to speed things up and ended up with a crust that resembled a melted candle—lesson learned.
Why Your Nose Knows Best
During blind‑baking, trust your sense of smell more than the timer. When you start to detect a nutty, toasted aroma, the crust is likely done, even if the timer still shows a few minutes left. This subtle cue ensures you never over‑bake the edges, preserving that delicate crunch.
The 5‑Minute Rest That Changes Everything
After mixing the dough, let it rest uncovered for five minutes before refrigerating. This short rest allows the flour to fully hydrate, which reduces shrinkage during baking. I once skipped this step and watched my tarts shrink dramatically, leaving unsightly gaps around the jam.
Jam Consistency Checkpoint
When your raspberry jam reaches a temperature of 220°F (105°C) on an instant‑read thermometer, it’s at the perfect set point. Below that, the jam stays runny; above it, the jam becomes too stiff and can crack as it cools. Keep a close eye on the thermometer for flawless jam every time.
The Edge Shield Technique
If you love a super‑crisp edge, brush the outer rim of the crust with a light coating of melted vegan butter before the final bake. This creates a glossy, caramelized edge that contrasts beautifully with the soft jam interior. The result? A visual and textural masterpiece that makes guests gasp.
Creative Twists and Variations
This recipe is a playground. Here are some of my favorite ways to switch things up:
Citrus Zing
Add a tablespoon of orange zest to the jam while it simmers. The citrus brightens the raspberry’s natural tartness, creating a flavor that feels like a sunrise on a summer patio. Perfect for brunch gatherings where you want a refreshing twist.
Chocolate Dream
Stir in a half‑cup of dark chocolate chips into the jam at the end of cooking. The chocolate melts into the raspberry, offering a decadent, bittersweet contrast that will make chocolate lovers swoon.
Spiced Autumn
Swap raspberries for a mix of apples and cinnamon. Cook the apples with a pinch of ground cinnamon and nutmeg, then use that as the filling. The warm spices turn these tarts into a cozy autumn treat.
Nutty Crunch
Fold toasted almond slivers into the crust dough before baking. The nuts add a subtle crunch that pairs beautifully with the soft jam, giving the tart an extra layer of texture.
Savory Surprise
Replace the raspberry jam with a caramelized onion and thyme jam for a savory appetizer version. The sweet‑savory combo works wonders at cocktail parties, proving that jam tarts aren’t limited to desserts.
Storing and Bringing It Back to Life
Fridge Storage
Place the cooled tarts in an airtight container and store them in the refrigerator for up to three days. The crust may lose a touch of crispness, but you can revive it by reheating briefly.
Freezer Friendly
Wrap each tart individually in parchment paper, then seal them in a freezer‑safe bag. They’ll keep for up to two months. When you’re ready to serve, thaw overnight in the fridge and give them a quick 5‑minute blast at 350°F to bring back that buttery snap.
Best Reheating Method
Before reheating, add a tiny splash of water (about a teaspoon) to the jam center; this creates steam that revives the jam’s glossy sheen. Pop the tarts in a preheated oven at 300°F for 8‑10 minutes, and you’ll hear that satisfying crack of the crust as it returns to life.