Love this? Pin it for later! 📌
When summer rolls around and my kitchen feels like a sauna, the last thing I want to do is turn on the oven. Yet, the craving for something creamy, tangy, and utterly refreshing never goes away. Enter this no-bake lemon cheesecake – my go-to dessert that has saved countless backyard barbecues, potluck dinners, and "I need something sweet right now" moments.
I first developed this recipe during a particularly brutal heat wave three years ago. My neighbor had invited us over for an impromptu patio dinner, and I volunteered to bring dessert without thinking about the temperature. After a quick pantry assessment, I realized I had everything on hand for a no-bake cheesecake, but I wanted something lighter than the traditional dense, heavy version. After a few experiments (and one overly enthusiastic addition of gelatin that created something resembling rubber), I landed on this perfectly balanced, cloud-like lemon cheesecake that practically dissolves on your tongue.
What makes this recipe special isn't just that it's no-bake – though that's certainly a bonus when it's 95°F outside. It's the way the bright lemon flavor cuts through the richness of the cream cheese, creating a dessert that feels indulgent yet somehow refreshing. The texture is what really gets people: think more mousse than traditional cheesecake, with a stability that holds its shape beautifully while remaining ethereally light.
This dessert has become my signature contribution to everything from baby showers (where its pale yellow color is always a hit) to Christmas dinner (when oven space is at a premium). I've made it in mini mason jars for individual servings, pressed it into a tart pan for a more elegant presentation, and even piped it into shot glasses for cocktail parties. No matter how you serve it, prepare for people to ask – no, demand – the recipe.
Why This Recipe Works
- No Oven Required: Perfect for hot days when you can't bear to heat up the kitchen, or when your oven is occupied with other dishes.
- Make-Ahead Friendly: This cheesecake actually improves after 24 hours in the fridge, making it ideal for entertaining.
- Light as Air: Whipped cream folded into the filling creates a mousse-like texture that's never heavy or dense.
- Bright, Real Lemon Flavor: Both zest and juice pack a punch without artificial taste – you'll never go back to bottled lemon extract.
- Beginner-Friendly: No water baths, no cracking tops, no worrying about over-baking – if you can operate a mixer, you can make this.
- Endlessly Adaptable: Swap the lemon for lime, add berries, or infuse the cream with herbs – the base recipe is your canvas.
- Impressive Presentation: Despite being simple to make, this dessert looks stunning with minimal decoration – a few berries or a dusting of powdered sugar is all it needs.
Ingredients You'll Need
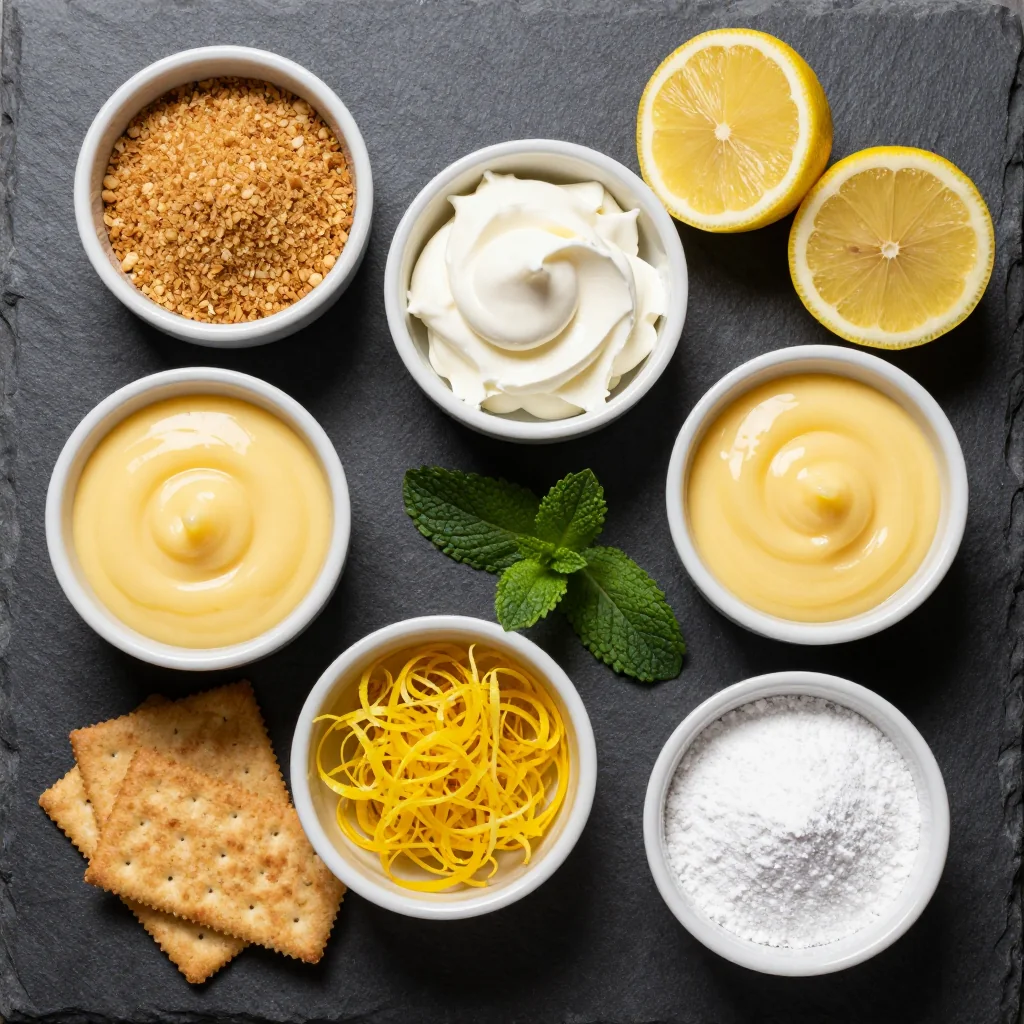
Before we dive into the method, let's talk about each component and why it matters. I've tested this recipe with various substitutions, and while it will technically work with alternatives, the results vary dramatically. Here's what I strongly recommend using for the best outcome:
Graham Crackers (1½ cups) – These form the foundation of our crust. While you could use digestive biscuits or even vanilla wafers, graham crackers provide the perfect balance of sweetness and crunch. Look for fresh ones – stale crackers make a stale-tasting crust. If you're feeling fancy, the cinnamon-sugar variety adds a lovely warmth.
Unsalted Butter (⅓ cup) – Salted butter can make the crust taste oddly savory, so stick with unsalted. European-style butters with higher fat content create a richer, more cohesive crust that holds together beautifully.
Cream Cheese (16 oz) – This is not the place for low-fat cream cheese. Full-fat is essential for both flavor and texture. Make sure it's completely softened – we're talking leave-it-on-the-counter-for-two-hours soft. Cold cream cheese will create lumps that no amount of mixing will fix.
Heavy Whipping Cream (1 cup) – The secret to our light texture. You need cream with at least 36% fat content for proper whipping. Ultra-pasteurized works fine, but if you can find cream that's simply pasteurized, it whips up more voluminously.
Powdered Sugar (¾ cup) – Regular granulated sugar can make the filling grainy. Powdered sugar dissolves instantly and helps stabilize the whipped cream. If you're out, you can pulse granulated sugar in a food processor with a bit of cornstarch.
Fresh Lemons (3-4) – Please, please don't use bottled lemon juice. You need both the zest and juice, and fresh lemons give you bright, complex flavor that bottled juice just can't match. Look for lemons that feel heavy for their size with smooth, thin skin.
Vanilla Extract (1 tsp) – A small amount, but it rounds out the flavors beautifully. Use real vanilla extract, not artificial. In a pinch, vanilla bean paste works wonderfully and adds those pretty specks.
Unflavored Gelatin (2¼ tsp) – This is what allows our cheesecake to hold its shape without baking. Don't skip it or try to substitute with agar – the texture won't be right. One envelope of Knox gelatin is exactly 2¼ teaspoons.
How to Make No Bake Lemon Cheesecake For A Light Dessert
Prepare Your Pan
Lightly grease a 9-inch springform pan with butter or non-stick spray. Cut a circle of parchment paper to fit the bottom – this isn't strictly necessary, but it guarantees your cheesecake will release cleanly. If you don't have a springform pan, a deep 9-inch pie plate works, though you'll serve it directly from the dish rather than unmolding it.
Create the Graham Cracker Crust
In a food processor, pulse your graham crackers into fine crumbs – you want them to resemble sand, not have large chunks. Transfer to a bowl and pour in your melted butter. Stir with a fork until every crumb is moistened. The mixture should hold together when squeezed but not be swimming in butter. Press firmly into the bottom of your prepared pan, using the bottom of a glass to create an even layer. Make sure to press all the way to the edges and create a slight lip up the sides. Pop this into the freezer while you make the filling – a cold crust is less likely to crumble when you add the filling.
Bloom the Gelatin
This step is crucial for avoiding lumps. In a small bowl, sprinkle the gelatin over 2 tablespoons of cold water. Let it sit for 5-10 minutes – it will absorb the water and become a rubbery mass. Don't stir it during this time. After blooming, microwave it for 10-15 seconds until liquid, or place the bowl in a larger bowl of hot water until dissolved. Set aside to cool slightly – you want it liquid but not hot enough to cook your cream cheese.
Whip the Cream
In a large, cold bowl (I pop mine in the freezer for 15 minutes), beat the heavy cream until stiff peaks form. This means when you lift the beaters, the peaks should stand up straight without drooping. Be careful not to over-beat – we're going for light and fluffy, not butter. Set this aside while you make the base – having the cream pre-whipped ensures maximum lightness in our final product.
Make the Cream Cheese Base
In another bowl (yes, we're using three bowls – I promise it's worth it), beat the softened cream cheese until perfectly smooth and fluffy, about 2-3 minutes. Scrape down the sides frequently. Add the powdered sugar, lemon zest, lemon juice, and vanilla. Beat until completely combined and smooth. The mixture should be light and spreadable, with no lumps of cream cheese remaining.
Incorporate the Gelatin
With the mixer running on low, slowly stream in your cooled, liquid gelatin. Mix just until combined – over-mixing can make the cheesecake rubbery. The gelatin needs to be evenly distributed throughout the cream cheese mixture to ensure proper setting.
Fold in the Whipped Cream
Here's where the magic happens. Using a large rubber spatula, gently fold the whipped cream into the cream cheese mixture. Start by adding about one-third of the cream and mixing it in thoroughly to lighten the base. Then add the remaining cream and fold with a gentle, sweeping motion, turning the bowl as you go. Stop as soon as no streaks of white remain – over-folding deflates the cream and gives you a dense cheesecake.
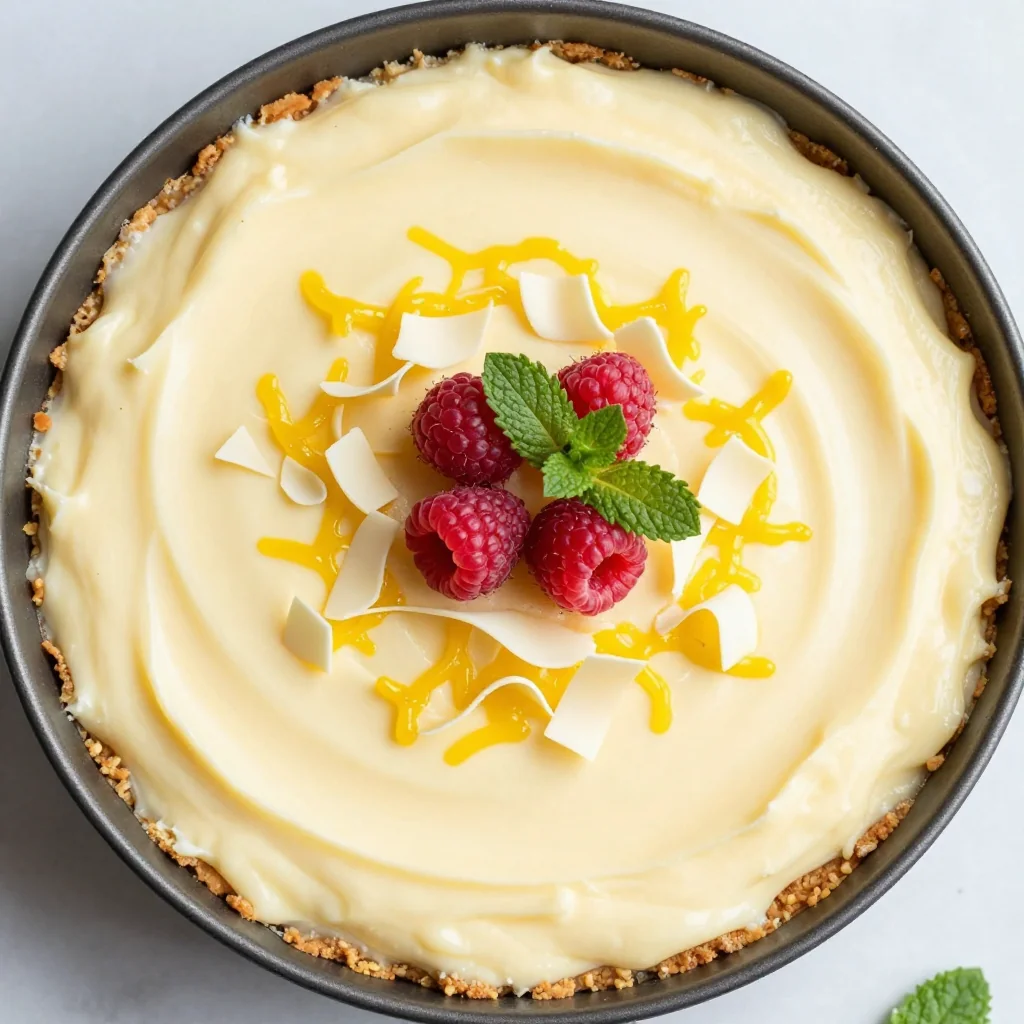
Fill and Chill
Retrieve your chilled crust from the freezer. Pour the filling into the pan, smoothing the top with an offset spatula or the back of a spoon. Tap the pan gently on the counter to release any large air bubbles. Cover with plastic wrap, making sure it doesn't touch the surface of the cheesecake. Refrigerate for at least 6 hours, but overnight is even better. The gelatin needs time to work its magic.
Unmold and Serve
When ready to serve, run a thin knife around the inside edge of the pan. Release the springform latch and carefully lift the ring away. If you used a regular pie plate, serve directly from the dish. For clean slices, dip your knife in hot water and wipe it between cuts. Serve chilled, and prepare for compliments!
Expert Tips
Temperature Matters
All your dairy ingredients should be at room temperature. Cold cream cheese won't blend smoothly, and cold cream won't whip properly. Take everything out 2 hours before you start.
Don't Rush the Chill
I know it's tempting to serve this after 2-3 hours, but the texture improves dramatically with a full overnight chill. The gelatin needs time to set properly.
Juice Your Lemons Properly
Roll lemons on the counter before juicing to break down the membranes. A microplane zester gives you the finest zest without any bitter pith.
Serving Size
This cheesecake is so light that people tend to want larger slices. I'd plan on 10-12 servings rather than the typical 8-10 for baked cheesecakes.
Decorating Smart
If you want to add berries or other decorations, do it just before serving. The moisture from fruit can make the top weep if added too early.
Double Batch
This recipe doubles beautifully if you have a stand mixer. I've made it in a 9x13 pan for large gatherings – just increase the crust slightly.
Variations to Try
Key Lime Version
Swap the lemon juice and zest for key lime juice. Reduce the juice to ⅓ cup since key limes are more acidic. Add a drop of green food coloring if desired.
Lavender Lemon
Steep 1 tablespoon dried culinary lavender in the cream as you whip it. Strain before adding to the cream cheese mixture for a sophisticated twist.
Chocolate Swirl
Melt 2 oz white chocolate and marble it through the filling before chilling. The sweetness pairs beautifully with the tart lemon.
Individual Servings
Layer the crust and filling in small mason jars or pretty glasses. These make perfect picnic desserts and eliminate unmolding concerns.
Italian Twist
Add 2 tablespoons of limoncello to the filling and fold in some crushed amaretti cookies to the crust for an Italian-inspired version.
Holiday Version
Add ½ teaspoon of cinnamon and a pinch of nutmeg to the crust, and fold in some sugared cranberries for a winter holiday version.
Storage Tips
This cheesecake is a make-ahead dream, but proper storage is key to maintaining its perfect texture. Here's everything you need to know:
Refrigeration
The cheesecake will keep beautifully in the refrigerator for up to 5 days. Cover it tightly with plastic wrap, pressing the wrap directly against the surface if possible to prevent a skin from forming. After day 3, the texture might start to become slightly denser, but the flavor remains excellent. I actually think it tastes best on day 2, once the flavors have had time to meld.
Freezing
You can freeze this cheesecake for up to 2 months, though the texture will change slightly. Freeze it unwrapped for 2 hours until firm, then wrap tightly in plastic wrap and aluminum foil. Thaw overnight in the refrigerator. The texture will be slightly denser but still delicious. I recommend freezing individual slices for easy dessert emergencies.
Make-Ahead
This is my favorite dessert to make for entertaining because it's completely stress-free. You can make it up to 3 days ahead of your event. In fact, I recommend it! The flavor improves with time, and you'll have one less thing to worry about on the day of your party. Just keep it refrigerated until ready to serve.
Important Note
This cheesecake contains gelatin, so it will become soft if left at room temperature for too long. It's best served chilled, so don't leave it out for more than 30 minutes on a hot day.
Frequently Asked Questions
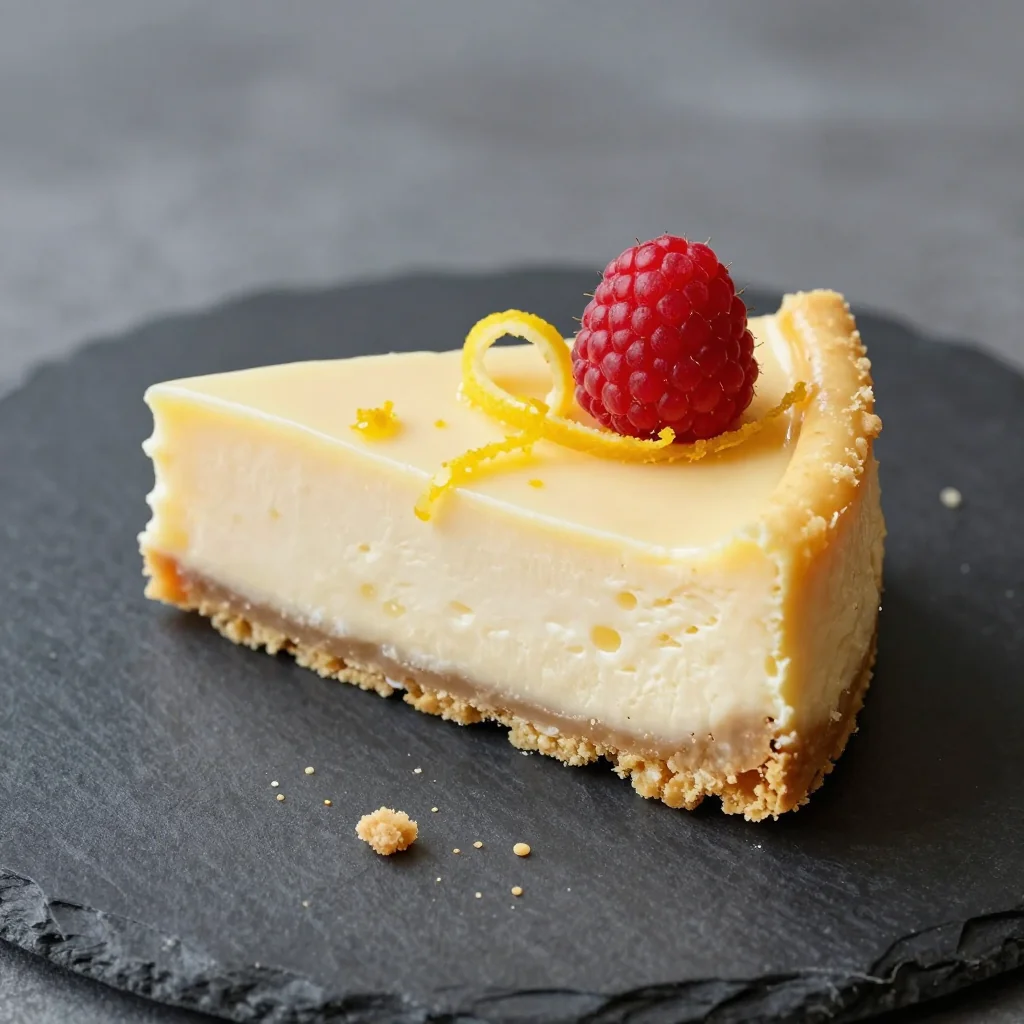
No Bake Lemon Cheesecake For A Light Dessert
Ingredients
Instructions
- Prepare the pan: Lightly grease a 9-inch springform pan and line the bottom with parchment paper.
- Make the crust: Combine graham cracker crumbs and melted butter. Press firmly into the bottom of the pan. Freeze while preparing filling.
- Bloom gelatin: Sprinkle gelatin over cold water and let stand 5-10 minutes until absorbed. Microwave 10-15 seconds until liquid.
- Whip cream: In a cold bowl, beat heavy cream until stiff peaks form. Set aside.
- Make filling: Beat cream cheese until smooth. Add powdered sugar, lemon juice, zest, and vanilla. Beat until combined.
- Add gelatin: With mixer on low, slowly pour in liquid gelatin. Mix just until combined.
- Fold in cream: Gently fold whipped cream into cream cheese mixture until no streaks remain.
- Chill: Pour filling over crust. Cover and refrigerate at least 6 hours or overnight until set.
- Serve: Run a knife around edge before unmolding. Slice with a warm knife for clean cuts.
Recipe Notes
For clean slices, dip your knife in hot water and wipe dry between cuts. This cheesecake is best served well-chilled and will keep for 5 days in the refrigerator.